Onboarding setup 4: Site, jobs, and unit management
Sites
Clicking the Sites button in the top navigation bar will direct you to the Sites section of the admin portal where you will manage your site(s), units, and rental settings & operations. This is also the page where you will typically land when logging into the management portal.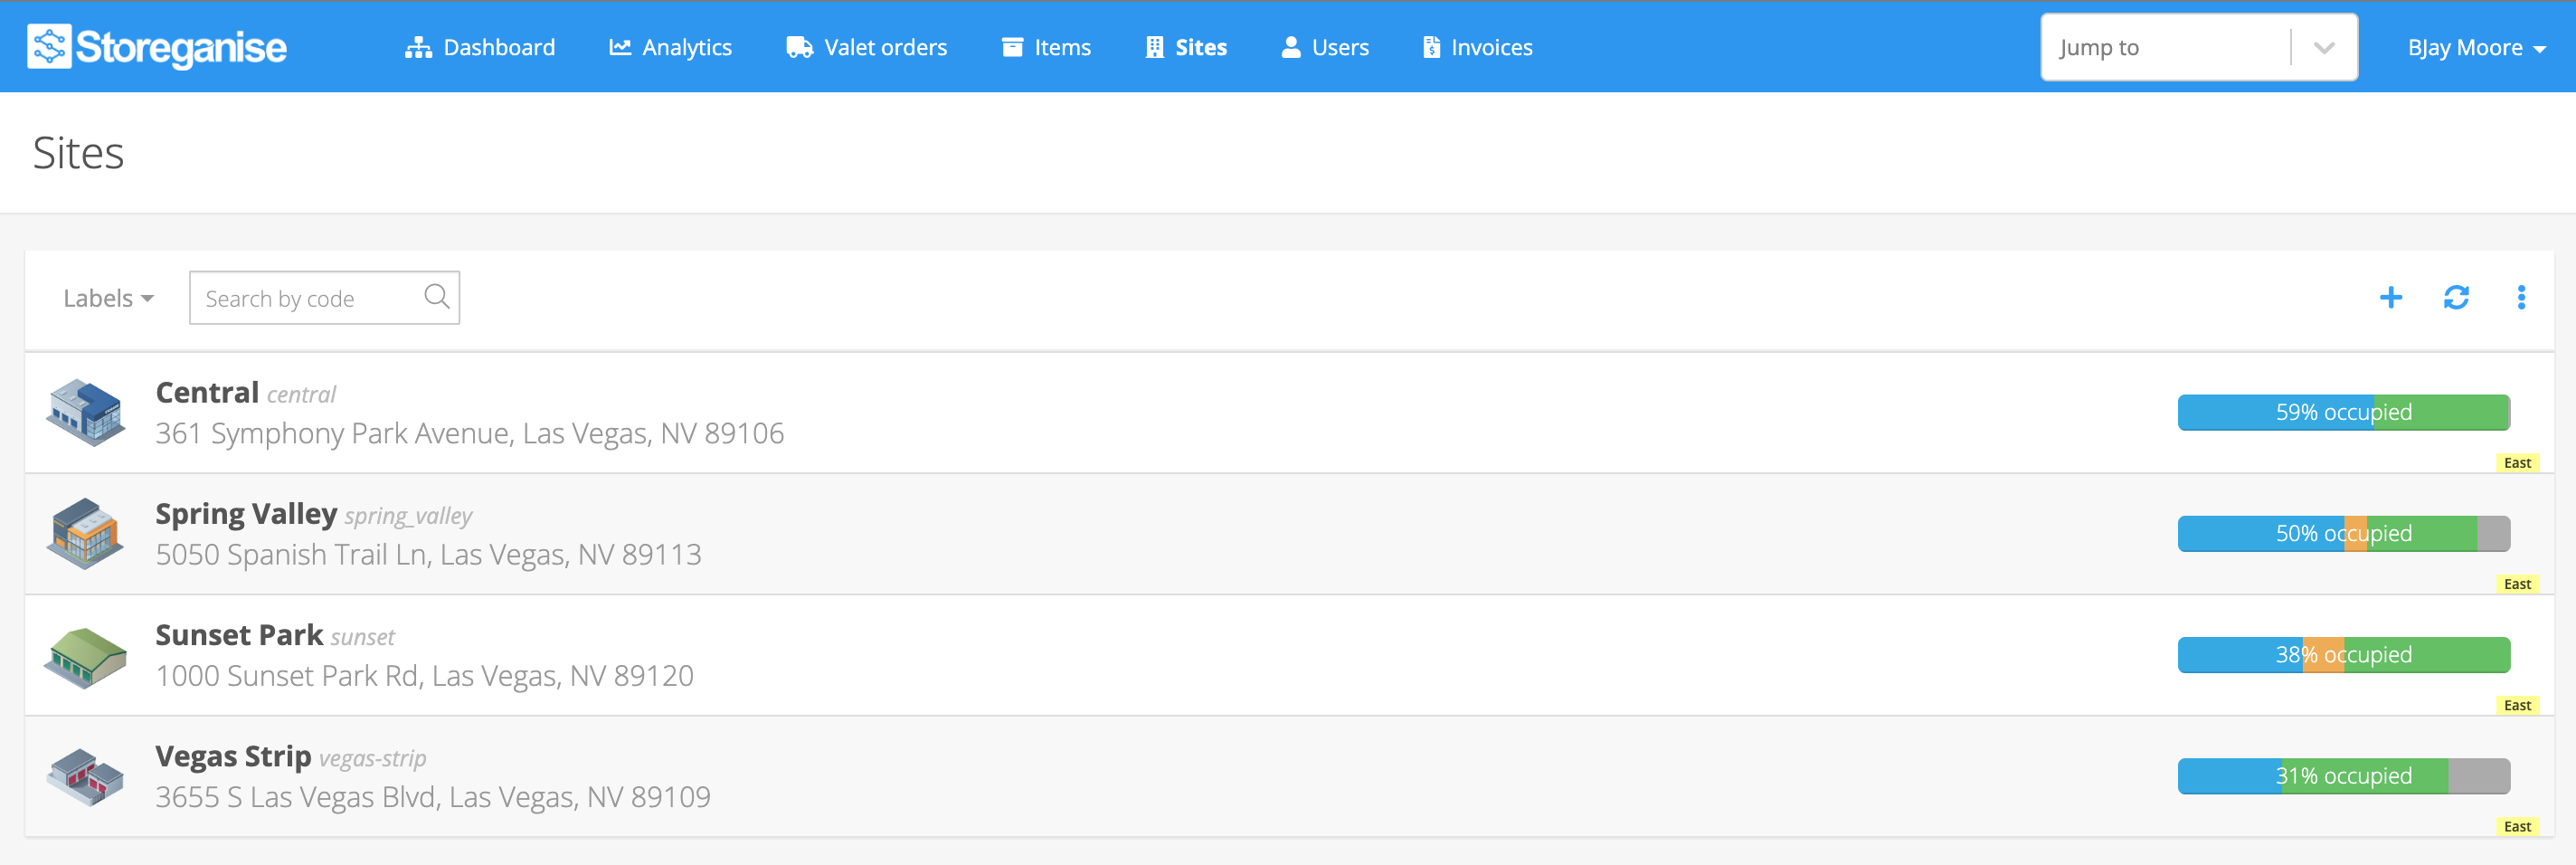
It is common to setup a new account by bulk importing data for your Unit types and Units. This will typically be done with assistance from our support team. If you are unsure what will be the best method for your business, discuss it with your Storeganise rep to determine the best solution for your needs.
If you intend to go this route by importing data rather than manual creation, you can skip the steps below for Unit types and Units.
Overview
A newly created site will present you with a 4-step setup checklist.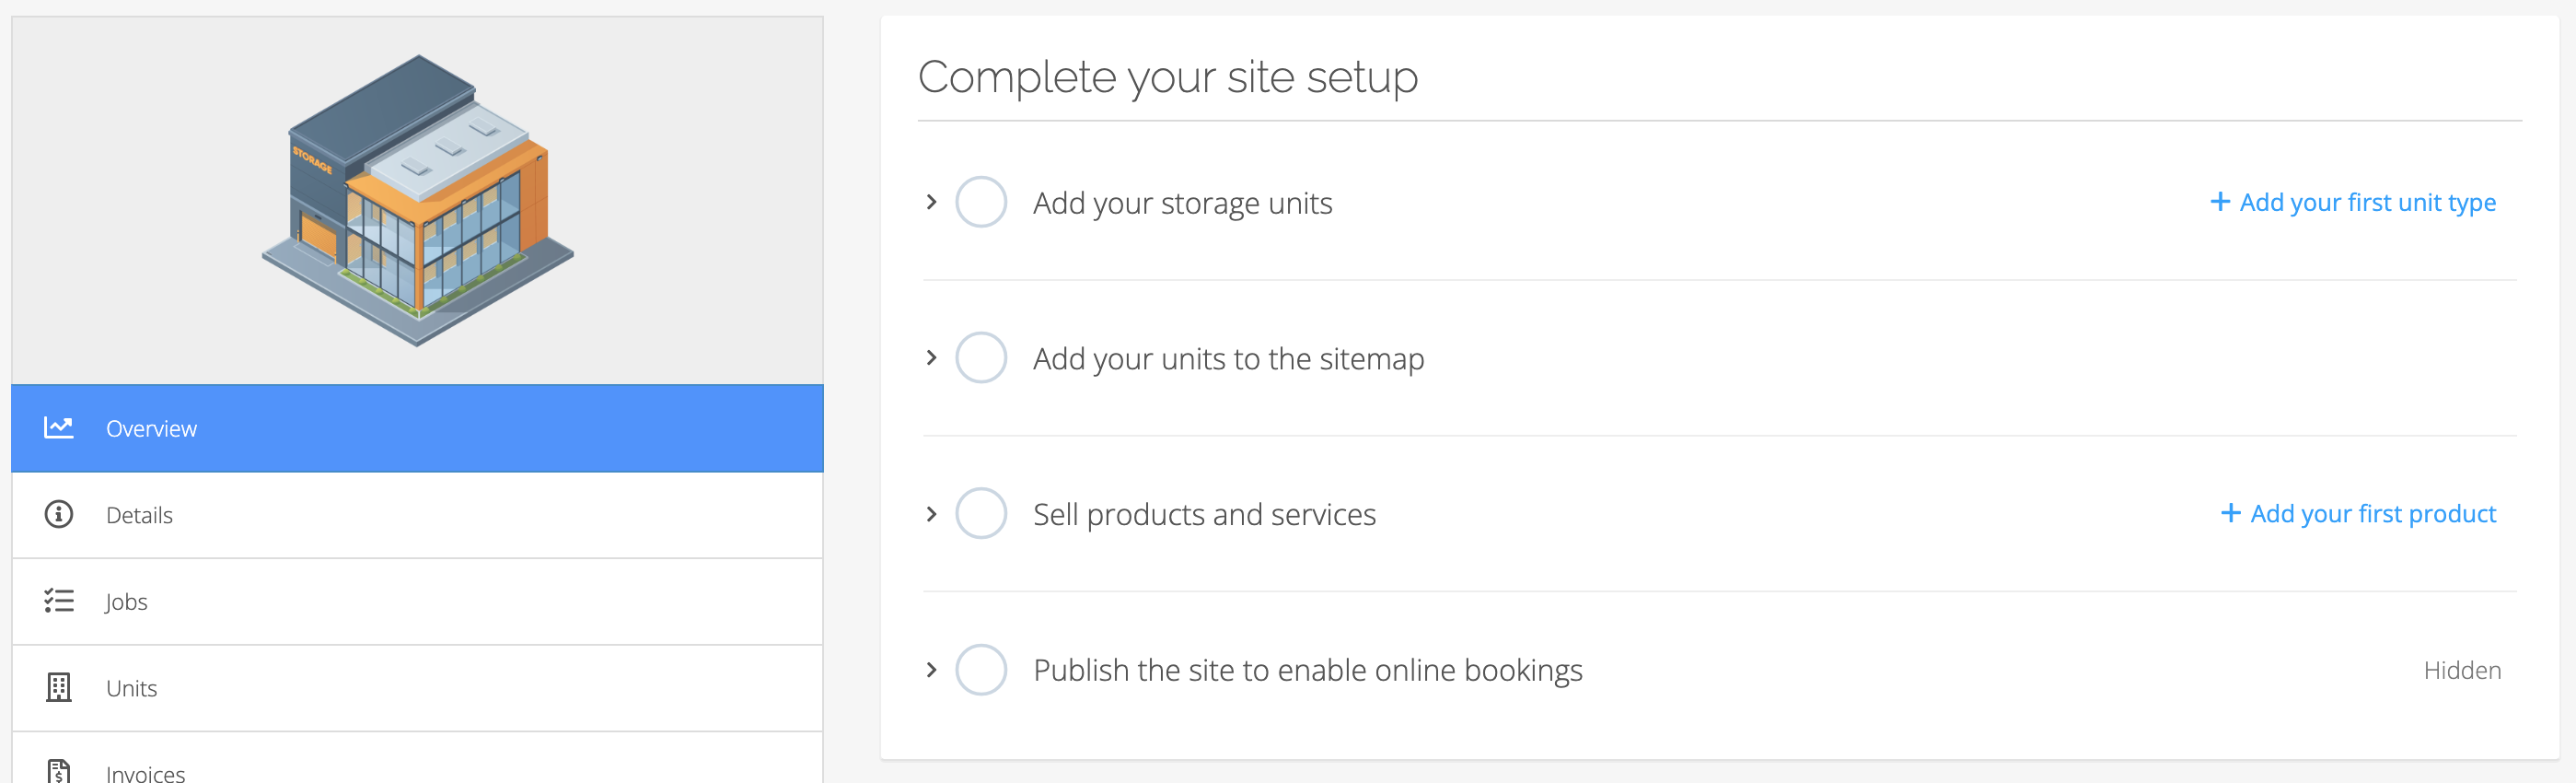
- Add your storage units
- View the Unit types section below for more information
- Add your units to the sitemap
- Once you have finished the Unit types and Units sections, you can begin building your sitemap
- Sell products and services
- View the Products section below for more information
- Publish the site to enable online bookings
- Once you are satisfied with the entire setup of your site, click the ‘Show in customer portal’ button to make your site live on the customer booking portal. Alternatively, you can find this option in the Advanced settings section.
Details
Setup your general, customer-facing site information. These sections are displayed in the booking portal during the checkout process. You can find more information about these settings here.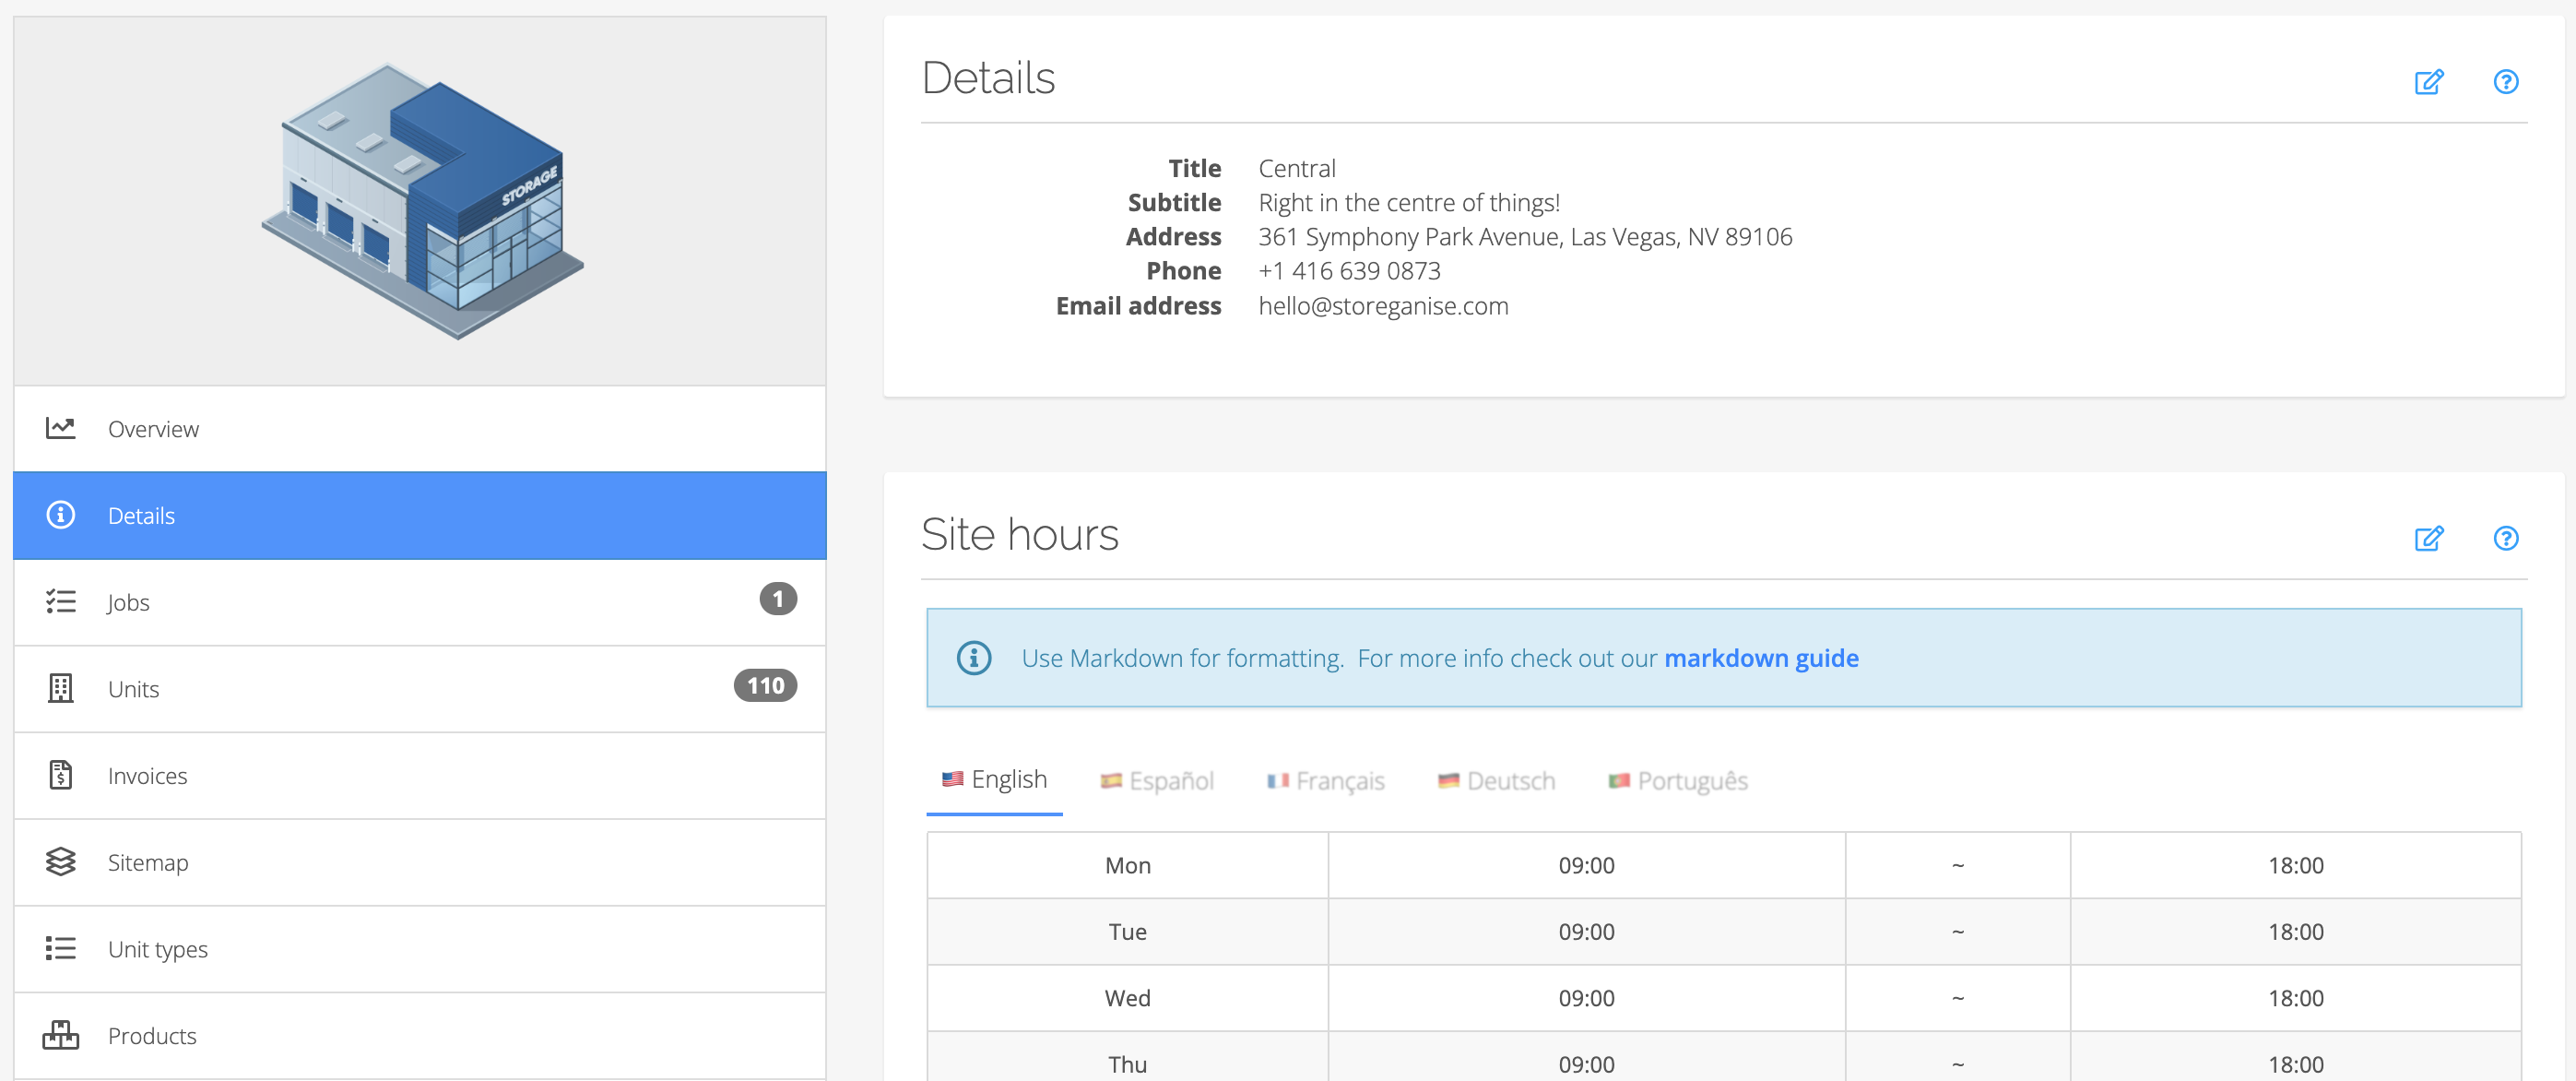
Jobs
Once your account is live and operational, this is where you will find active jobs such as upcoming scheduled move-ins and move-outs.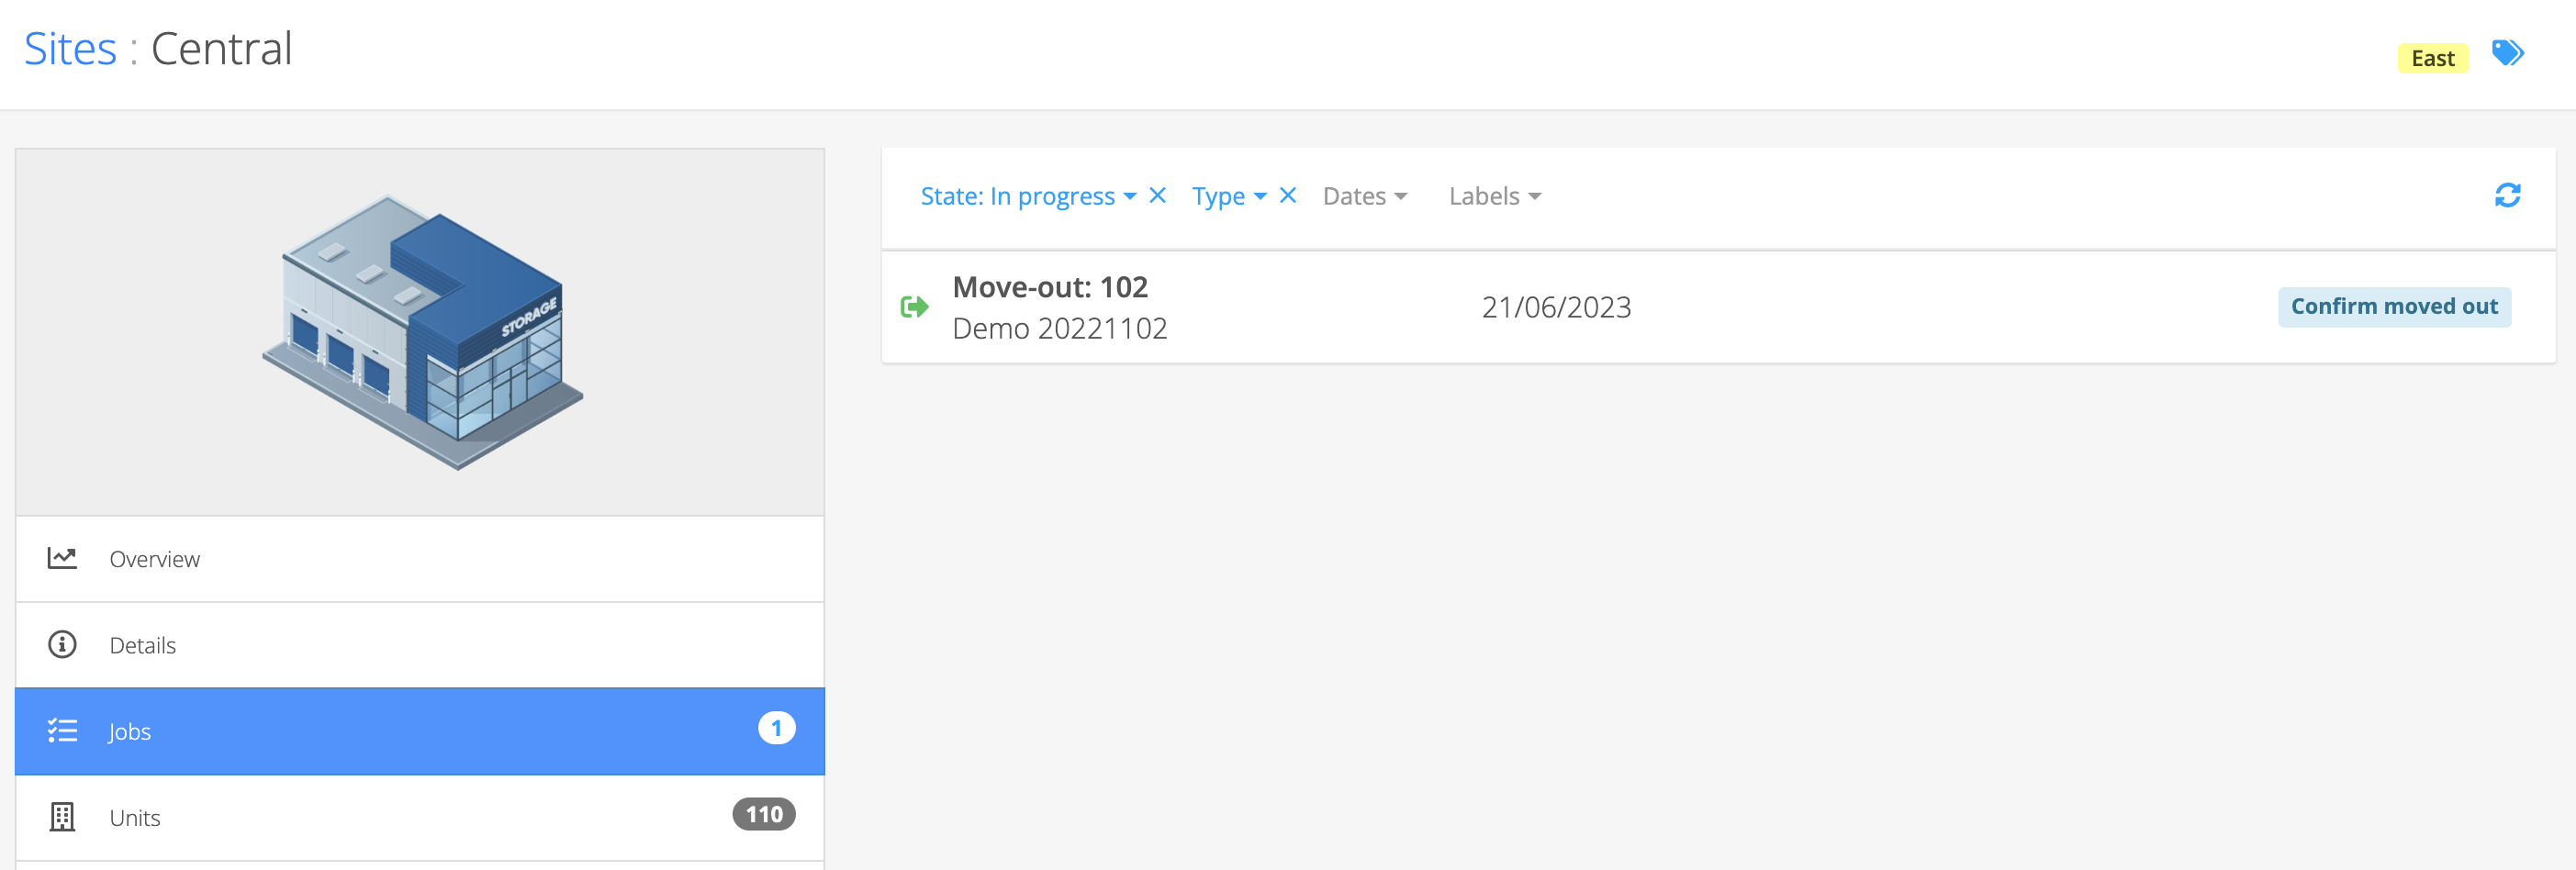
Units
You must first set up the Unit types section below before proceeding with the following instructions.Once your unit types have been created, you can begin adding your units.From the Units tab, click the + button to create new units against a specific unit type.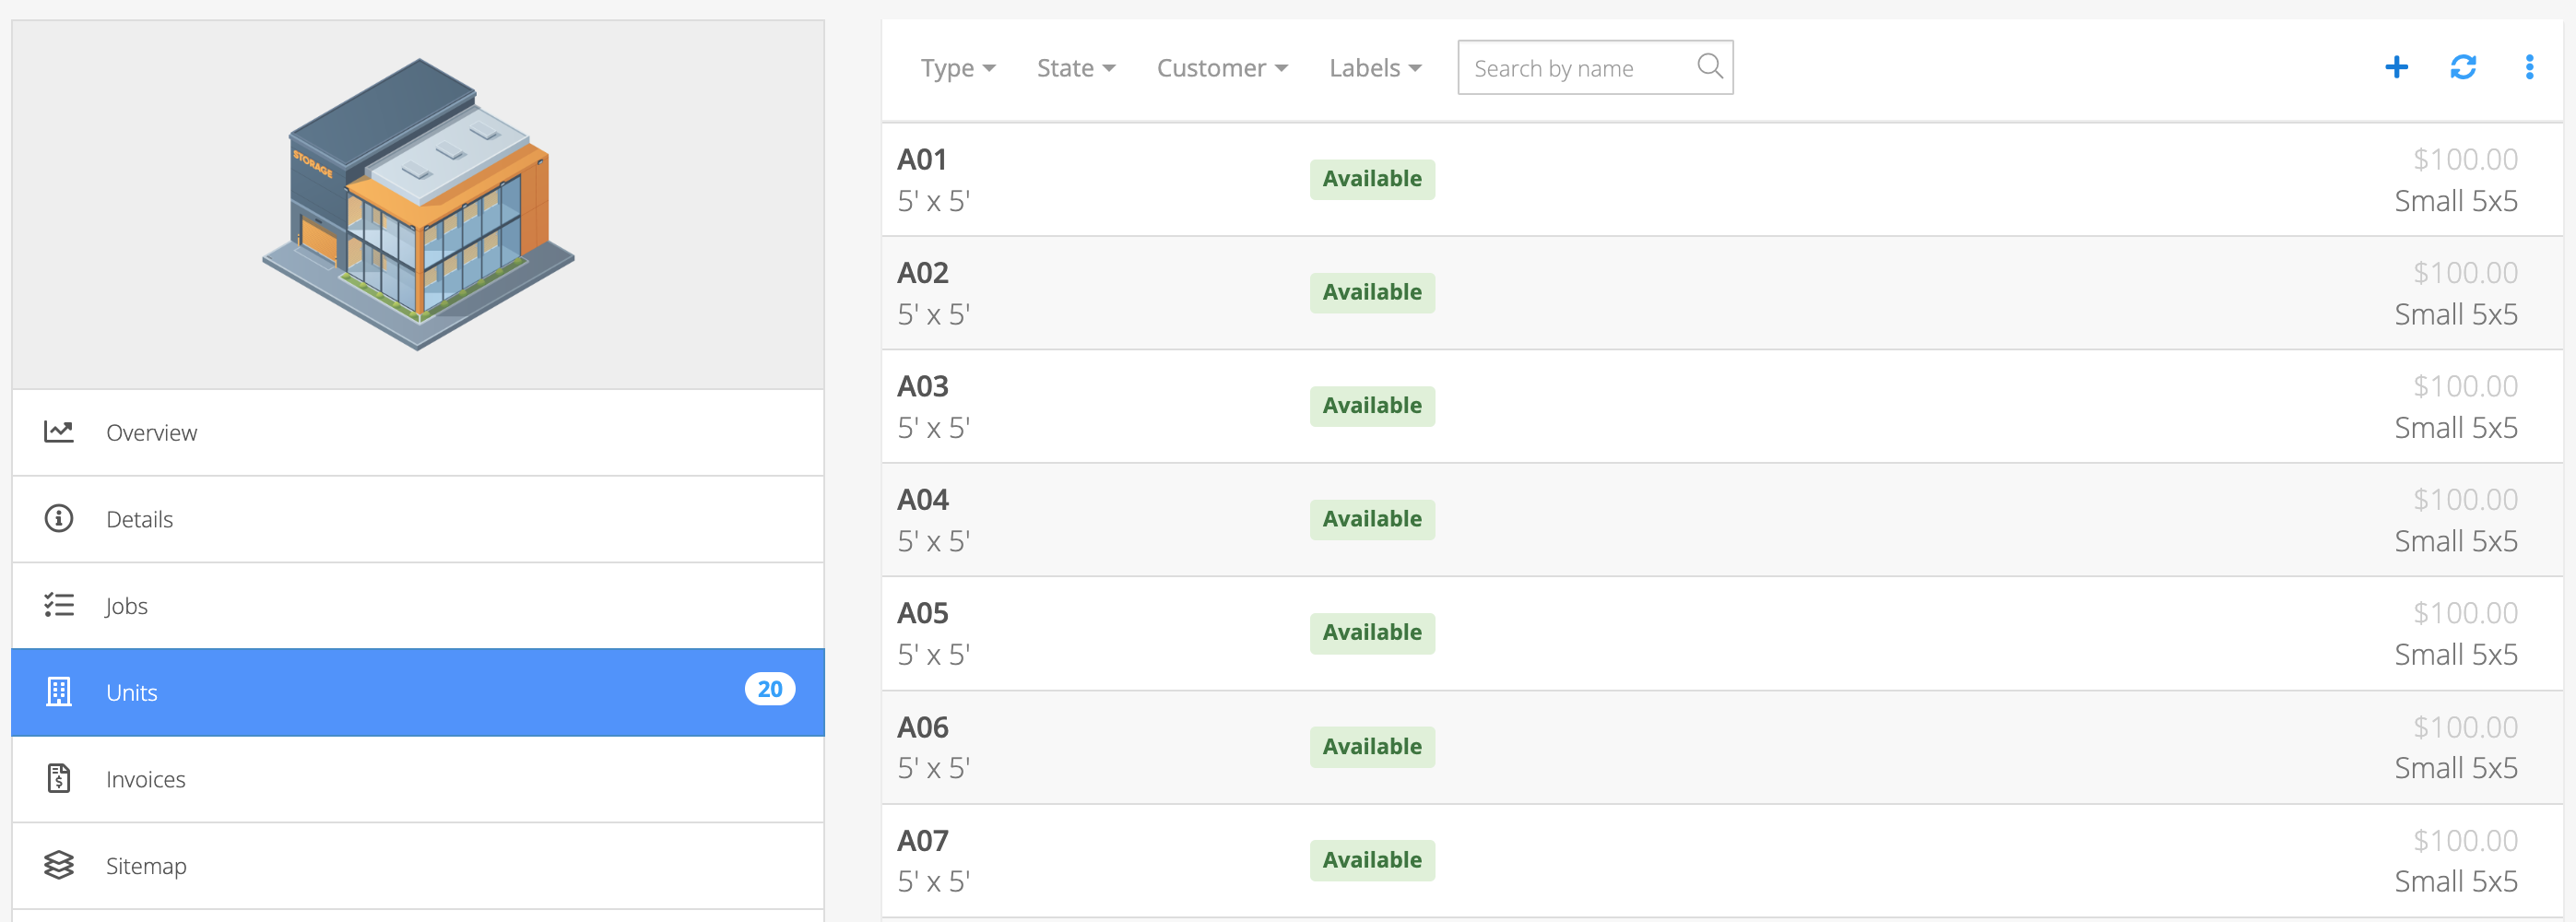
Invoices
This section will begin empty. Here you will find all invoices tied to this site once you begin operating your business through Storeganise.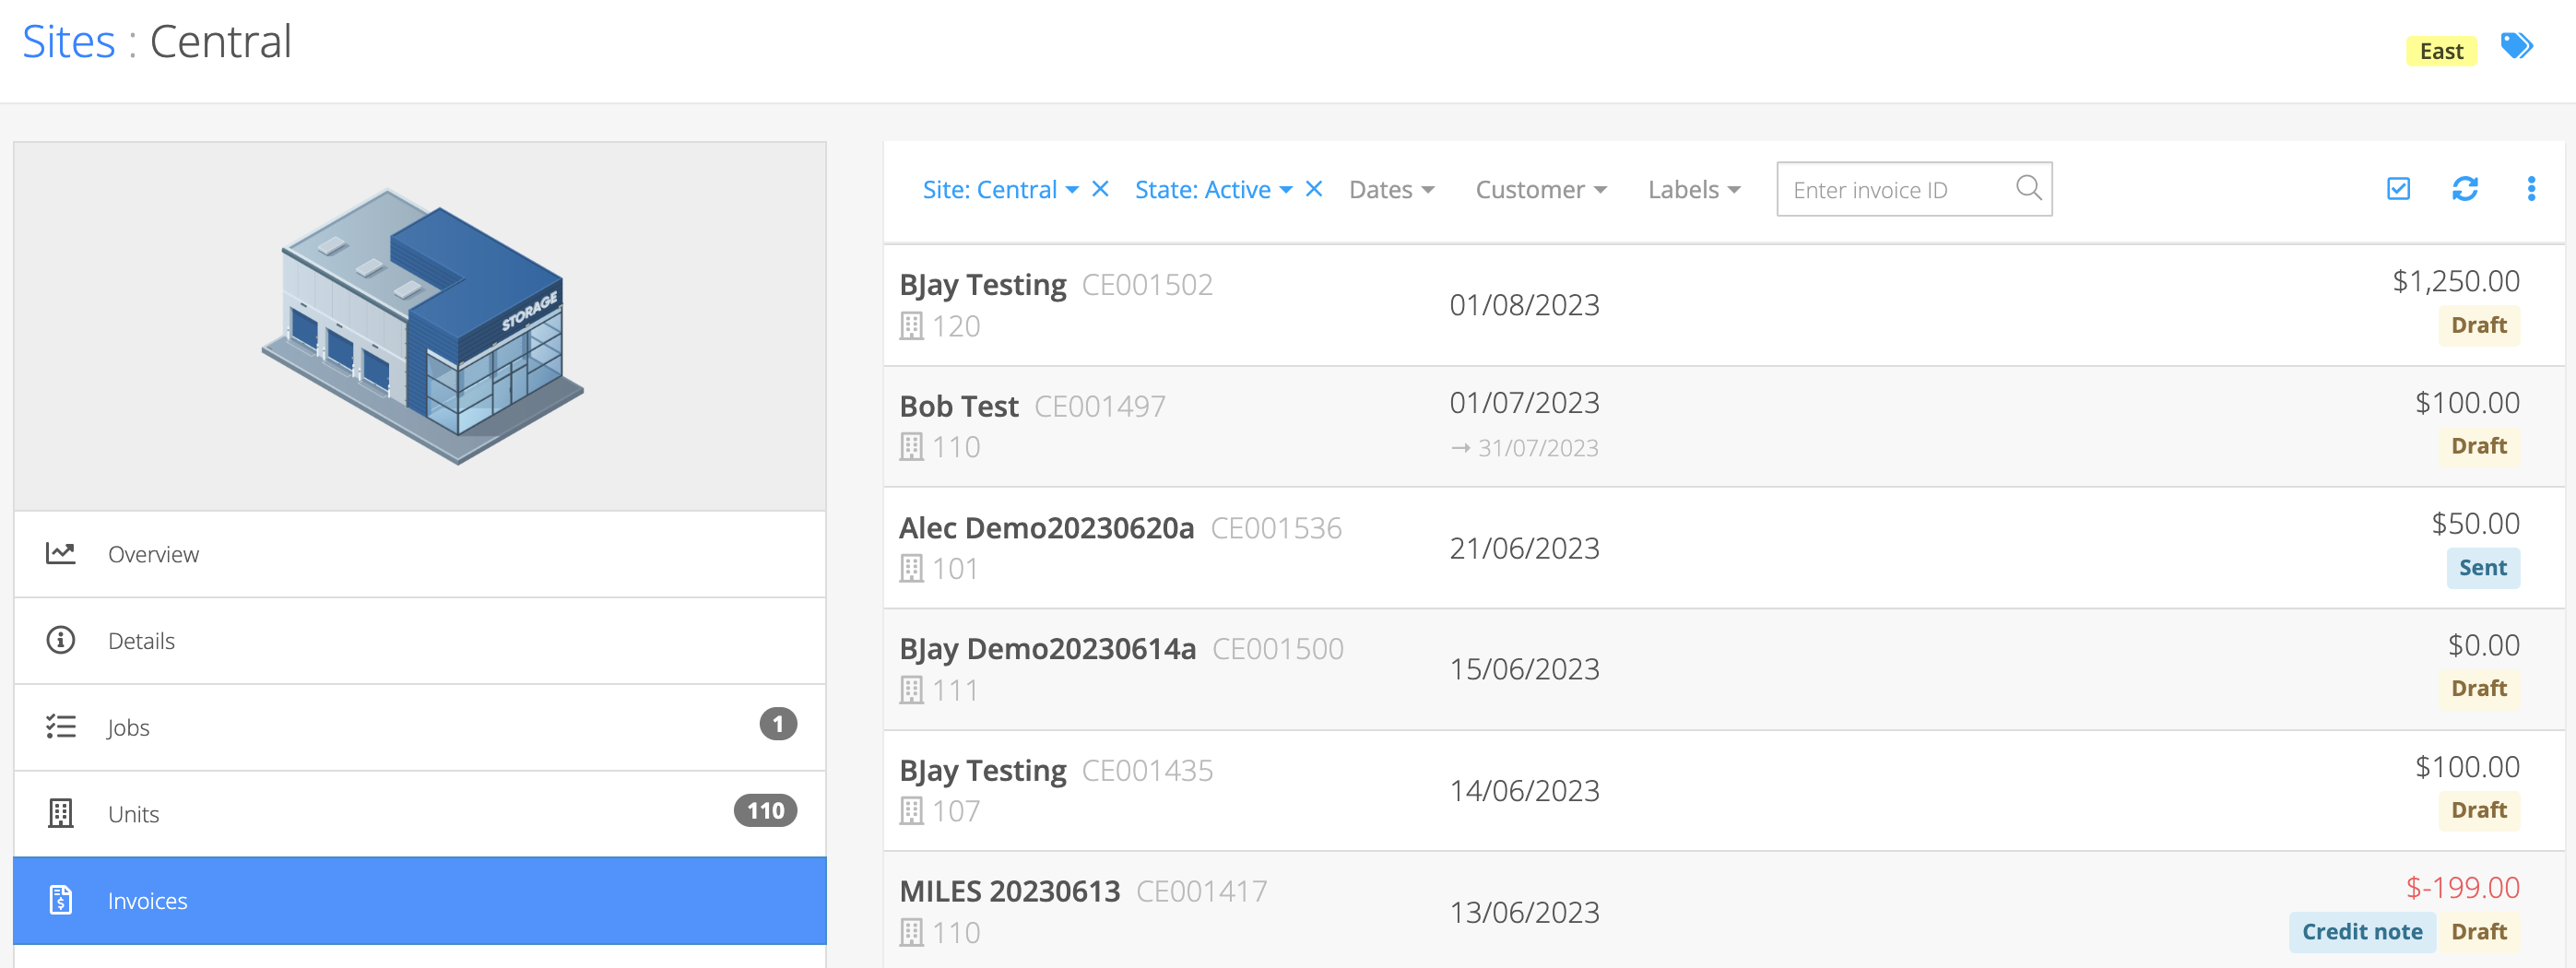
Sitemap
This is where you will set up and arrange your sitemap to match your physical location’s layout. You can find more information about these settings here.This cannot be done until after you have added all of your units.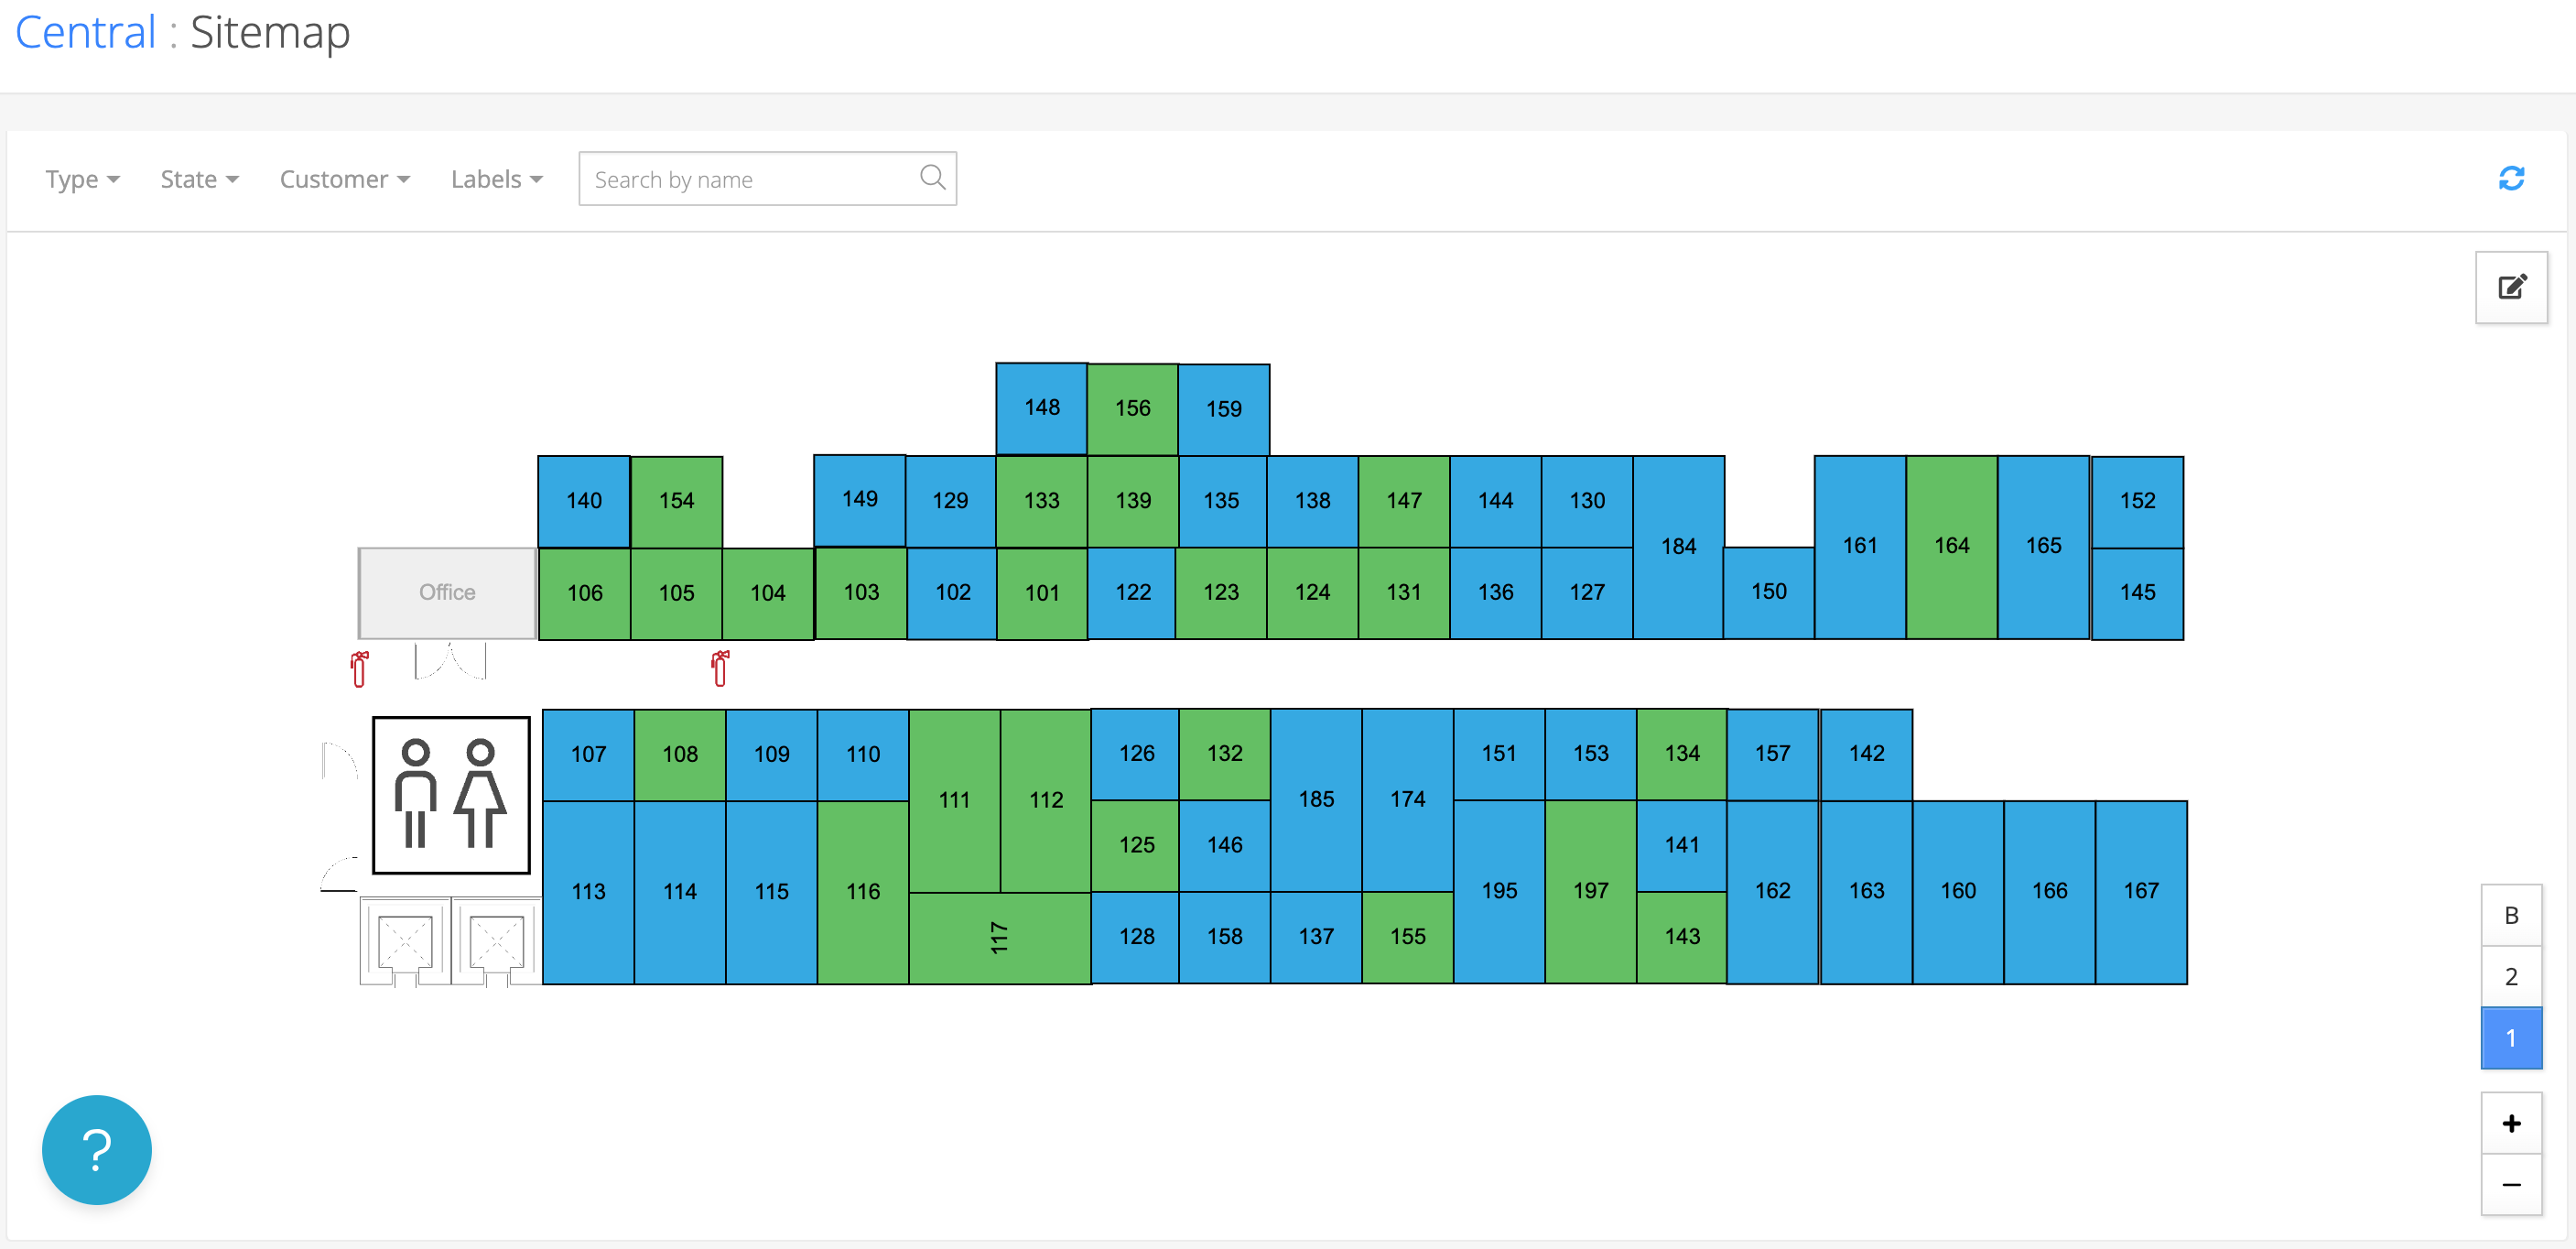
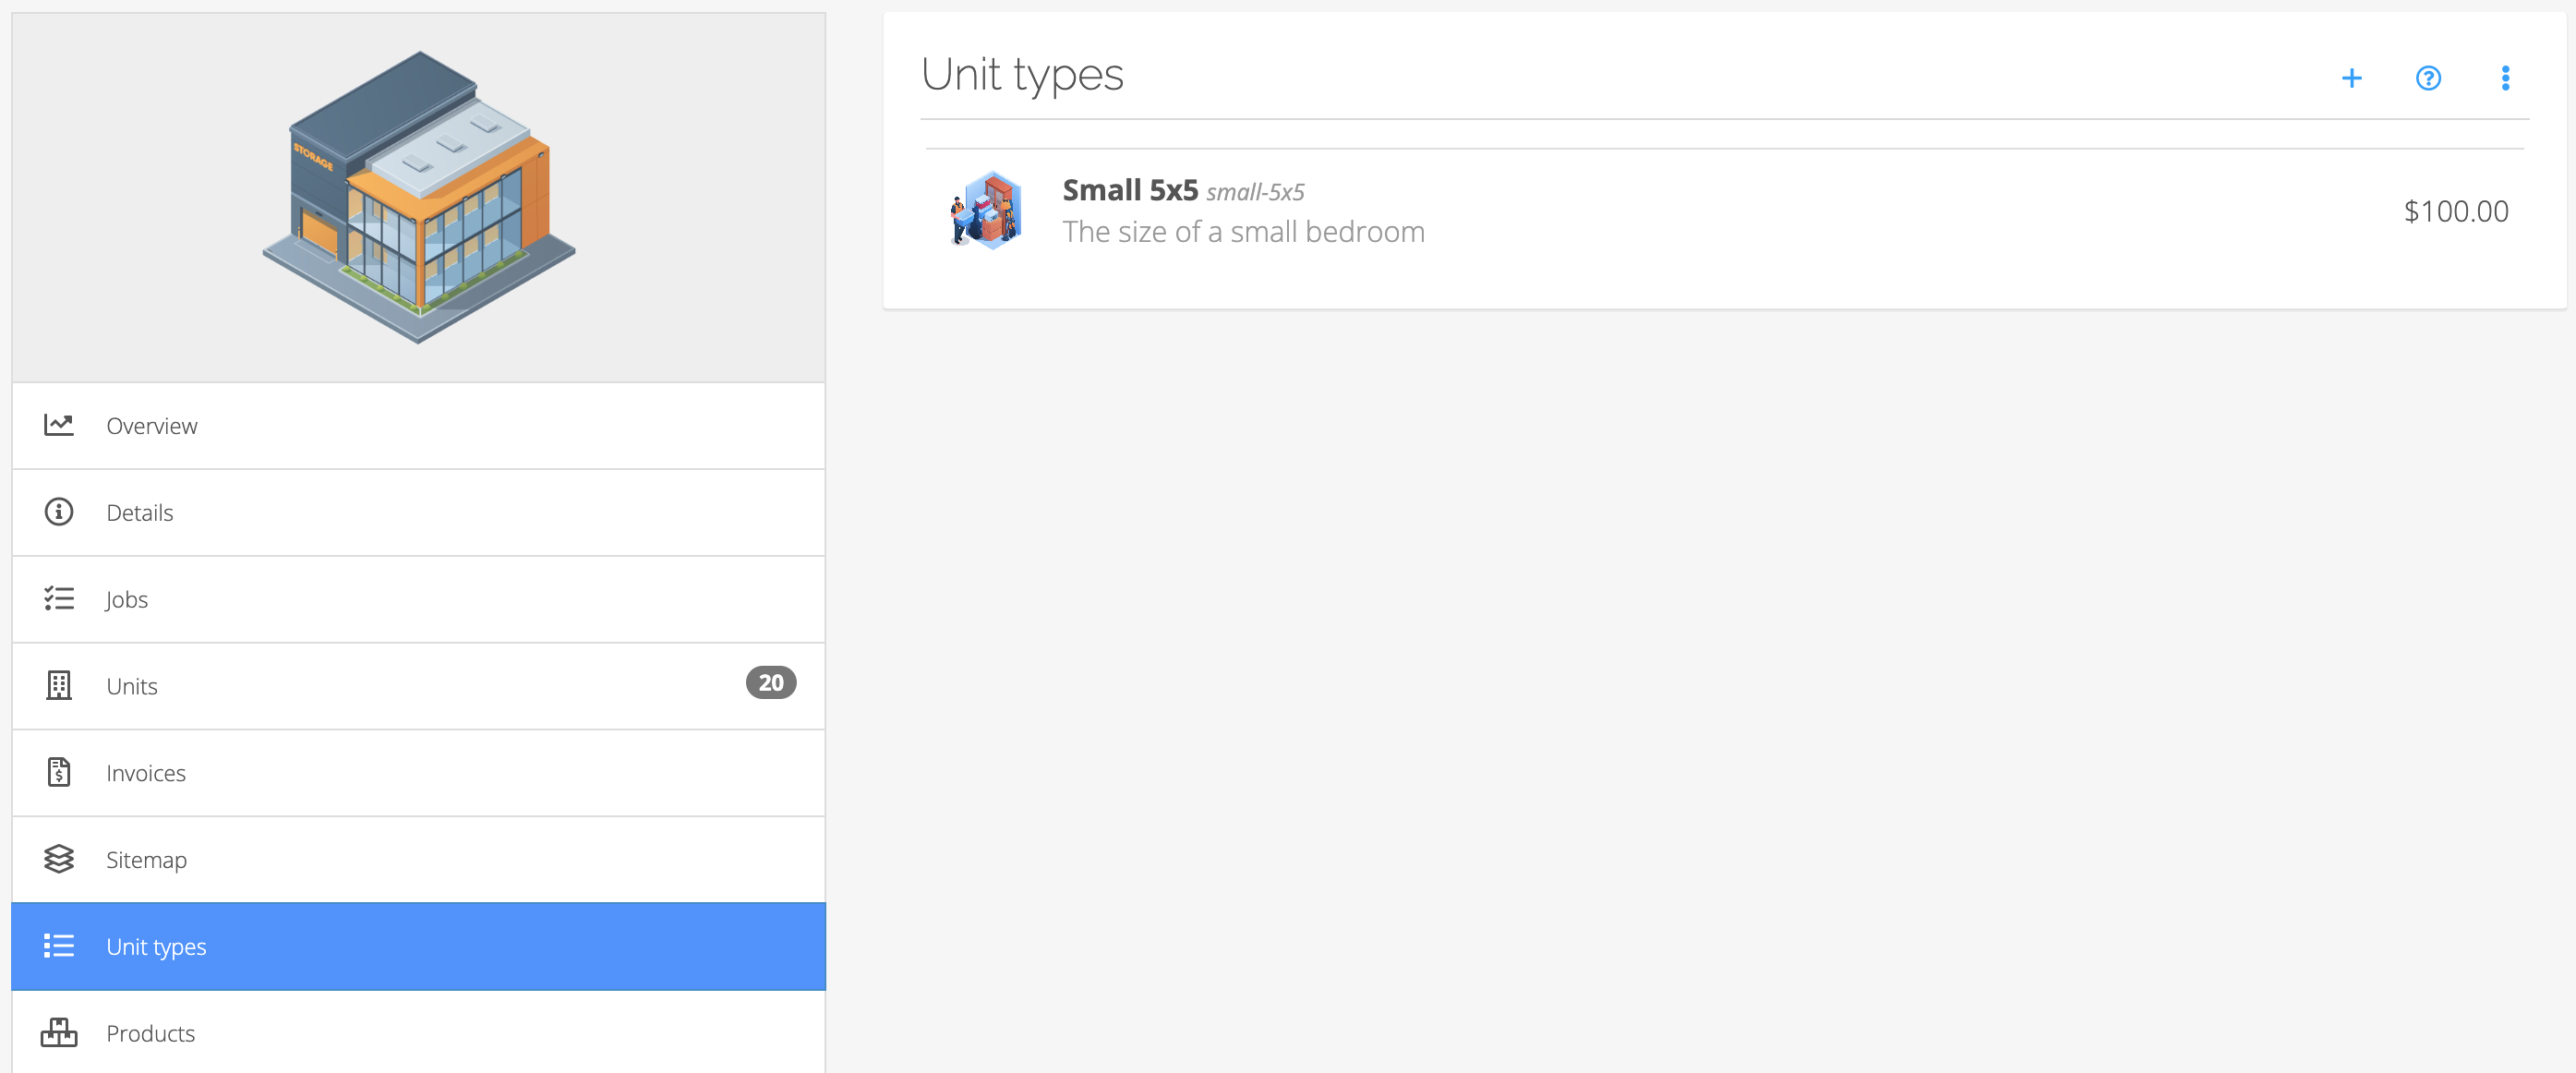
Unit types
From the site Overview section you can follow the Complete your site setup walkthrough to get your first unit types and units added to your account. Click the ‘+ Add the first unit type’ button to begin this process.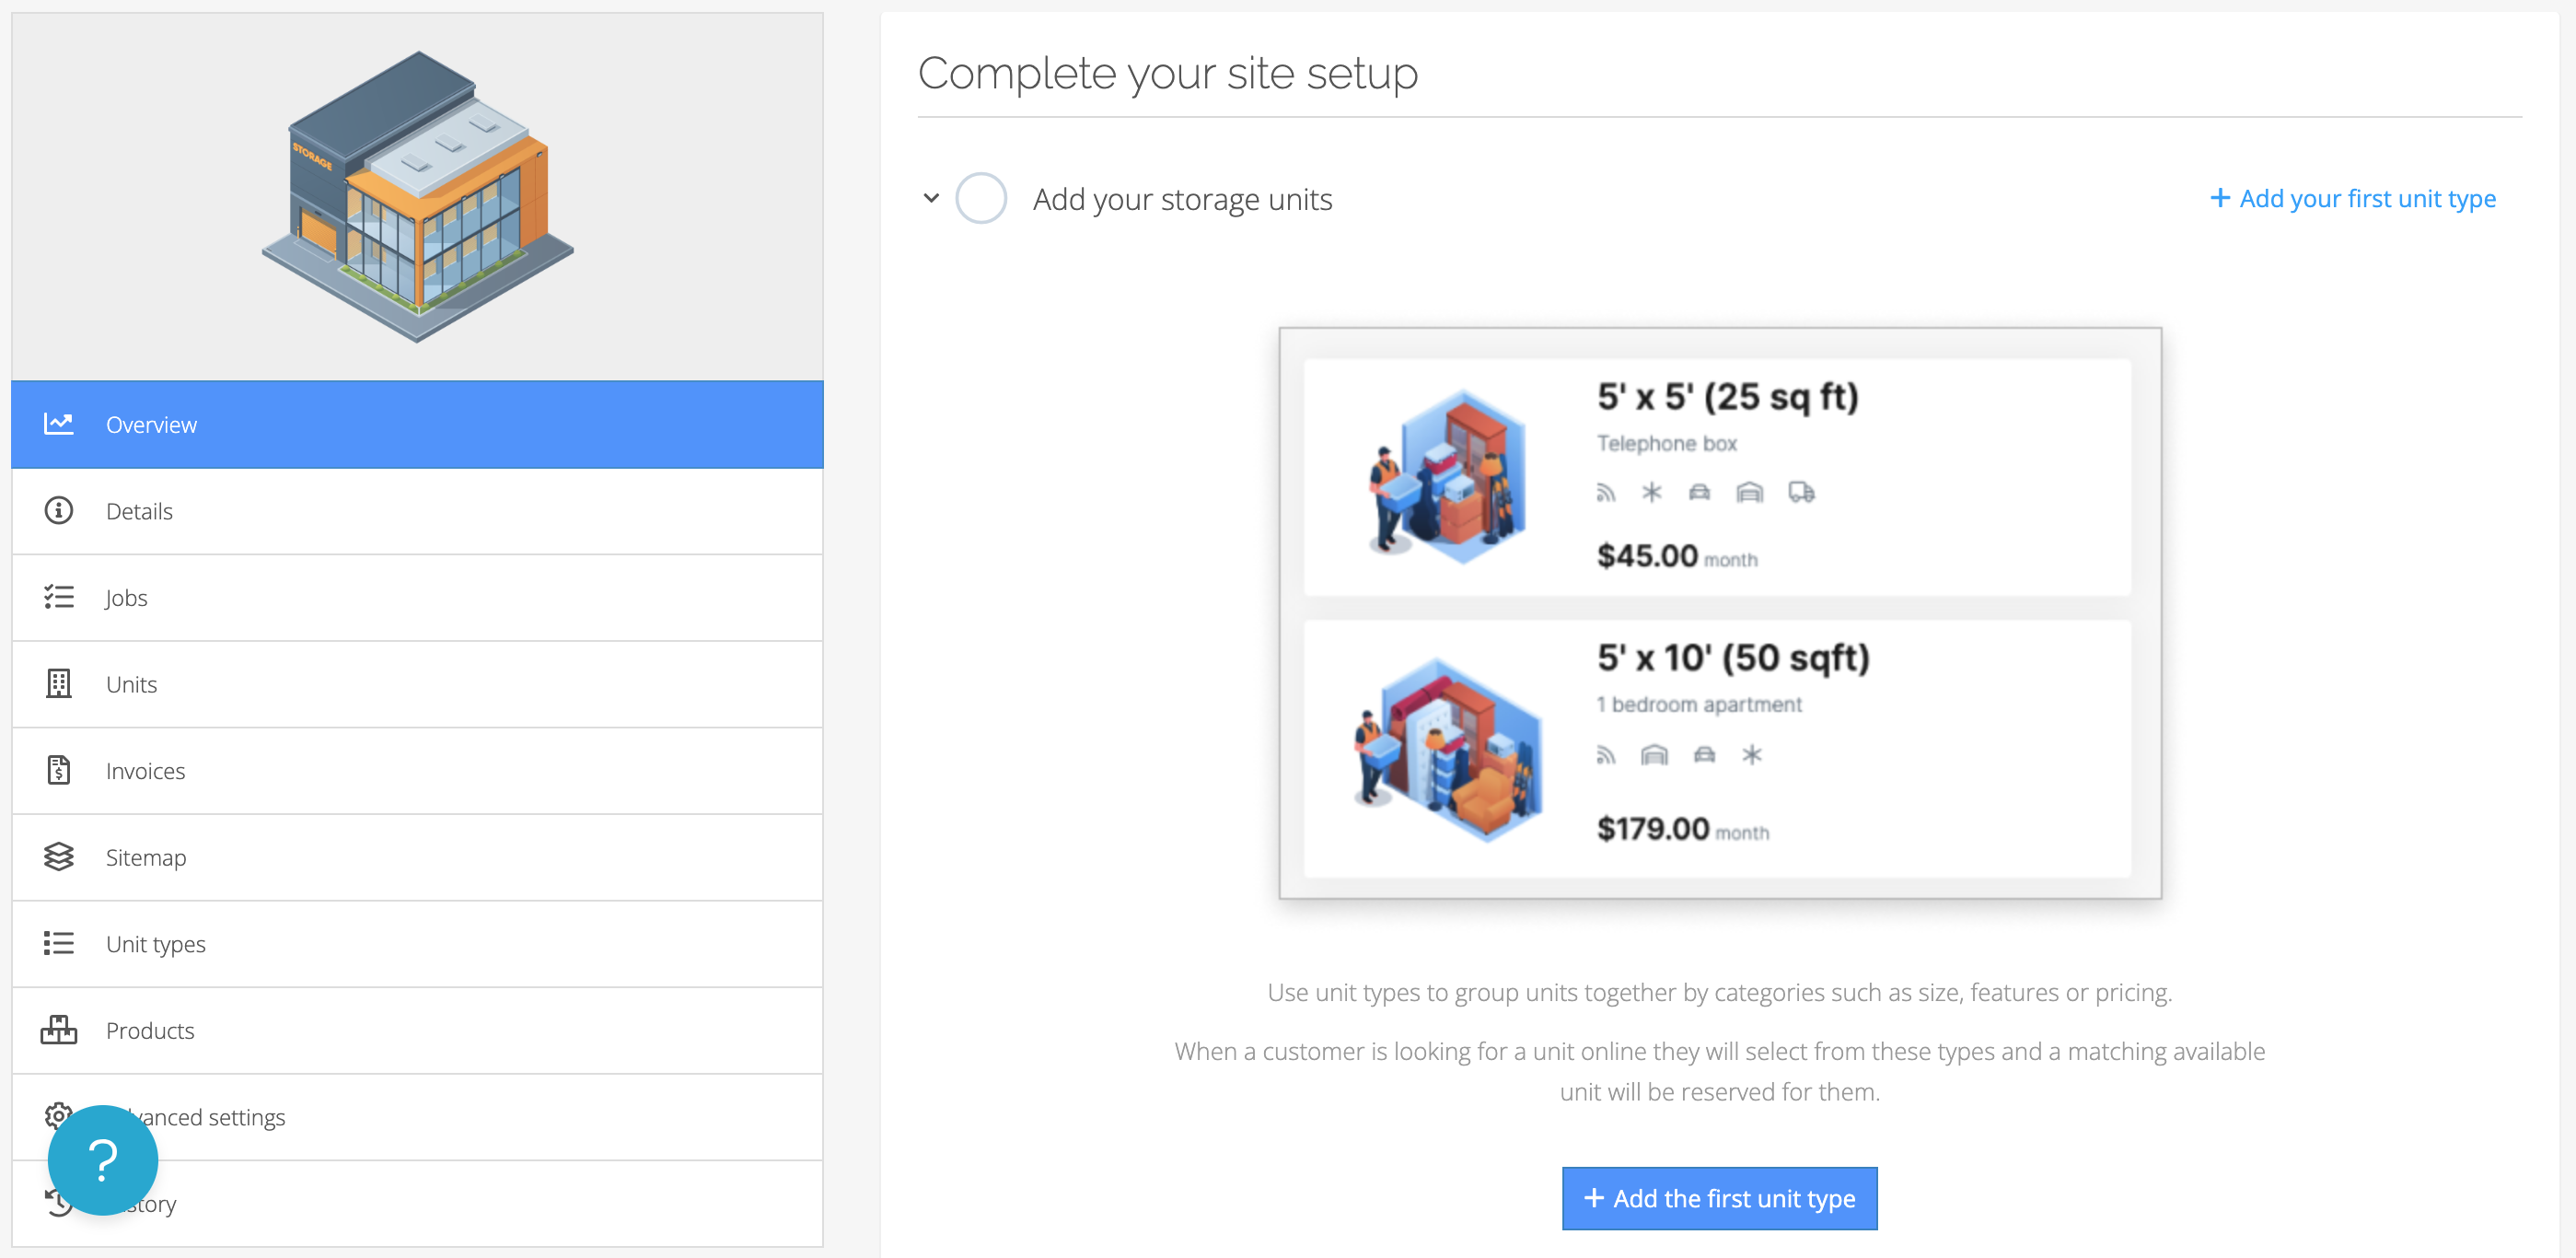
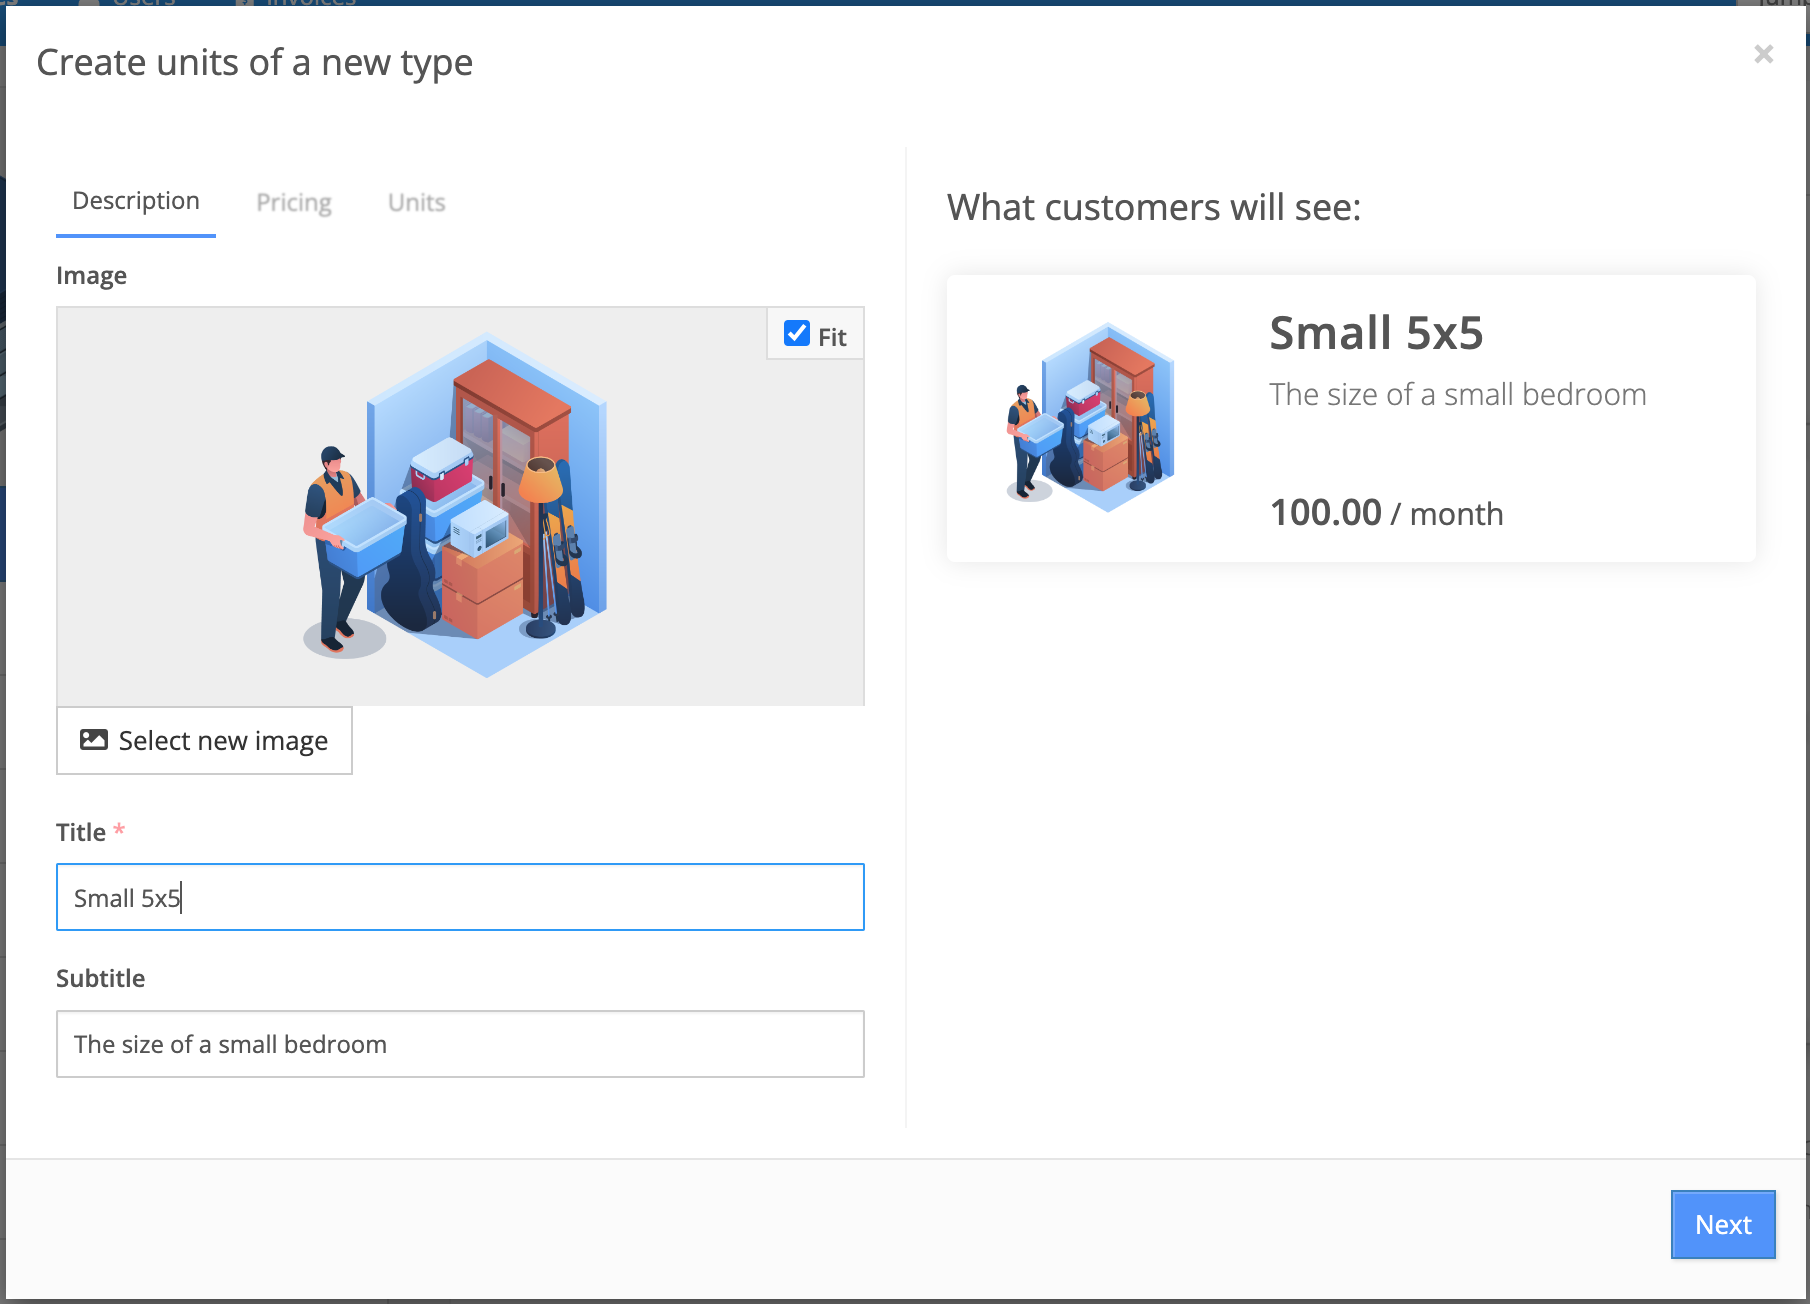
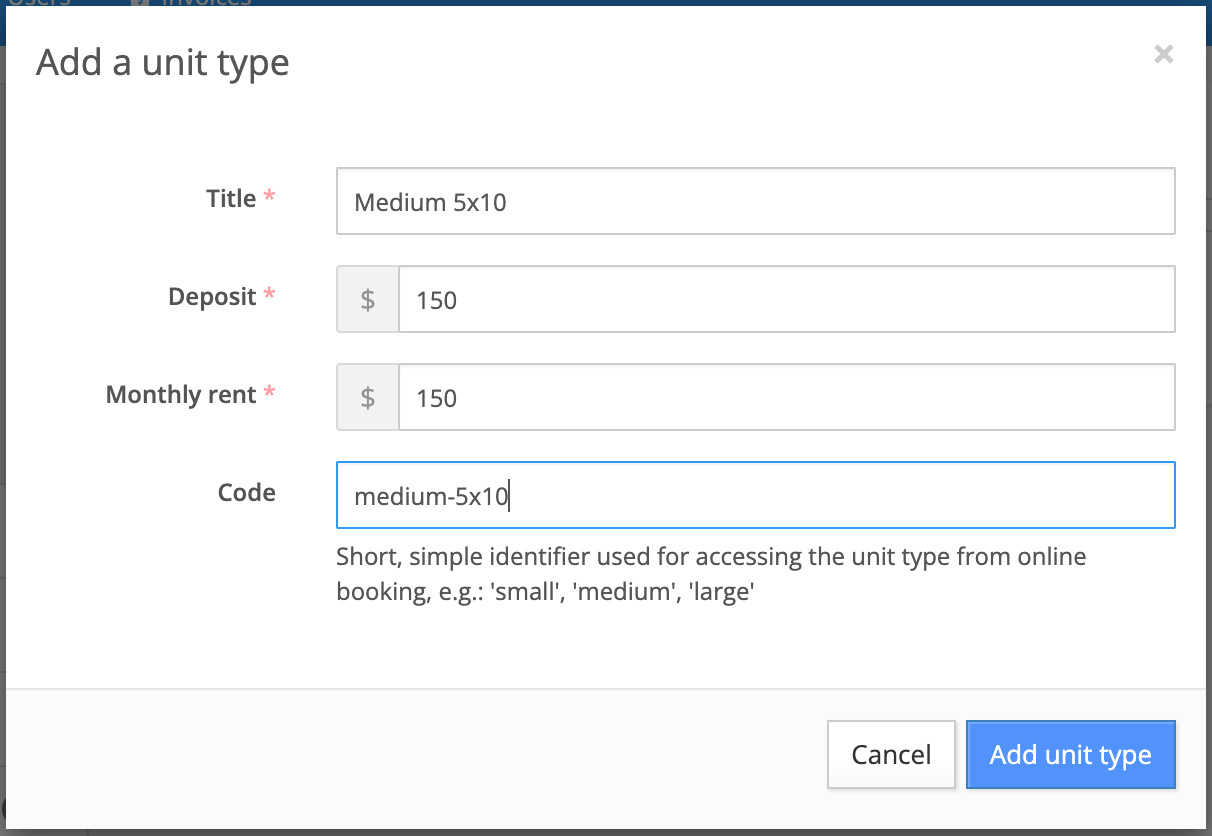
- Description
- Set the image, title, and subtitle for this unit type
- Pricing
- Set the deposit and monthly rent rates.
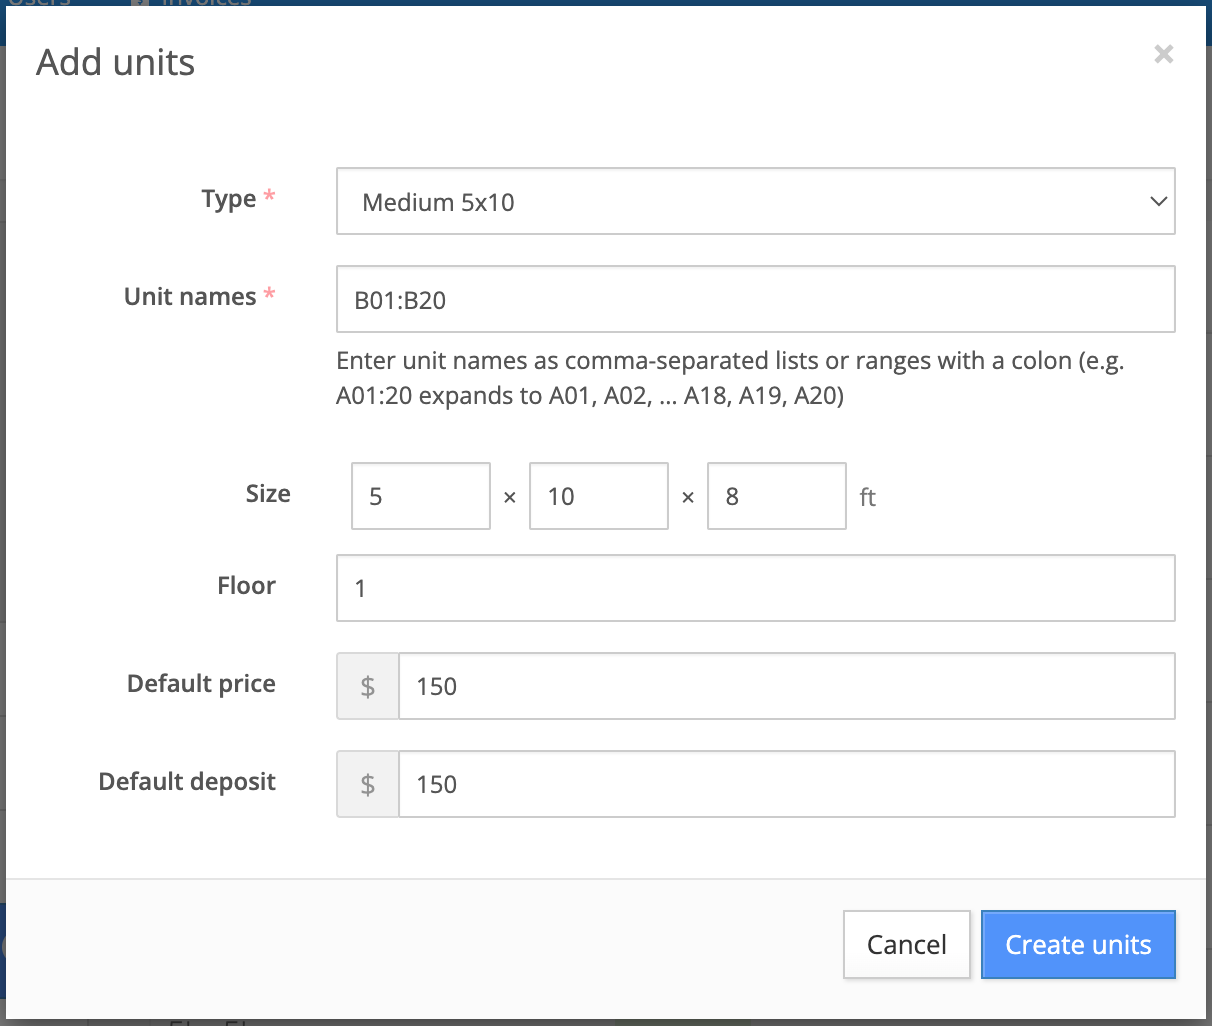
- Units
- Set the dimensions for this unit type and the floor, if your facility is multi-story.
- Establish the naming scheme for the units of this type as well as how many you would look to immediately create.
- Note: we recommend if you use a number-based scheme for naming your units that you use a leading-zero to ensure your units are listed in order for efficient navigating and operating. For example, 01, 02, 03, rather than 1, 2, 3, etc.
- You can generate multiple units at once by setting the first and last unit names separated by a colon. In this example we will be creating 20 identical units by entering 'A01:A20'. You will see icons for each unit populate on the right to give a preview of each unit's name.
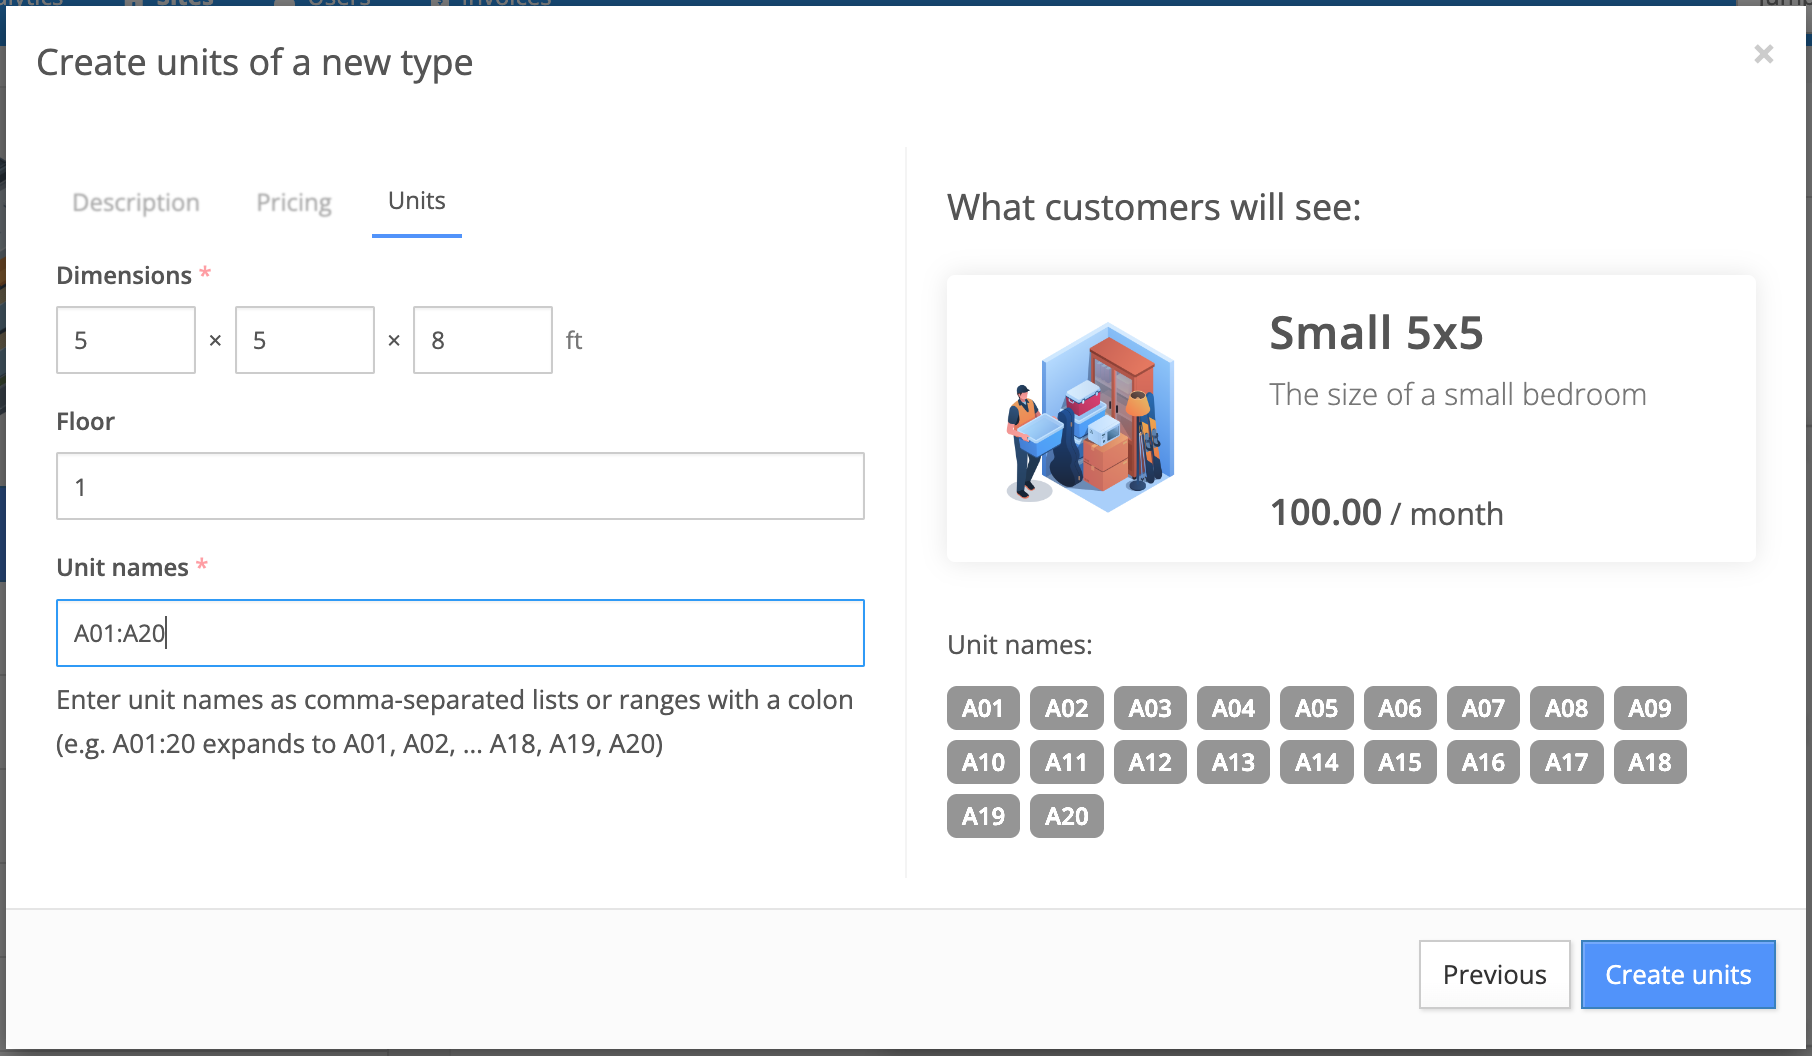
- Once you are satisfied with all of the settings, click on 'Create units'. All of your units have now been created for this site.
- The next two steps will direct you to setup your Sitemap and Products.
- Finally, the fourth step is simply making this site live for bookings. This is done by clicking the blue 'Show in customer portal' button.
Jump to