There are different sections in Storeganise where you can upload images related to your business. This article will cover these settings and provide some best practices for optimizing the images you use.
Uploading images
There are 3 primary sections where you can upload images to your Storeganise account: site, unit type, and products. These images are what display in your customer booking portal.There are no size restrictions or requirements for these image files. However, we recommend selecting a high resolution file to prevent any distortion or pixelation.We also provide images, which can be accessed here: Storeganise image illustrations.
Site
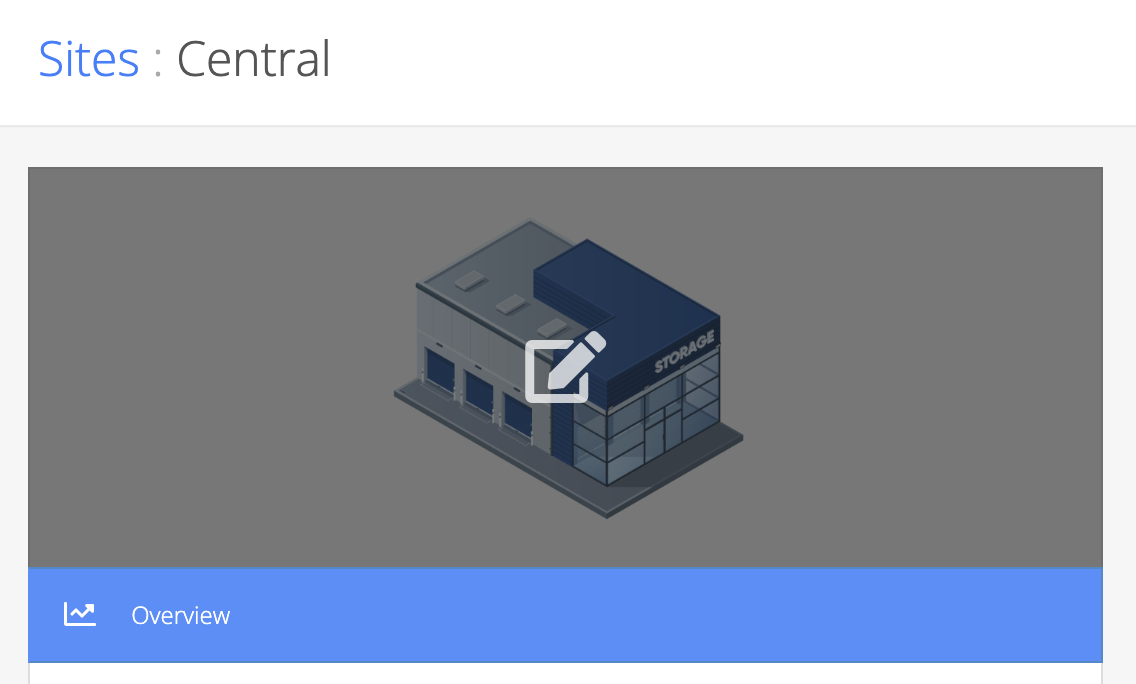
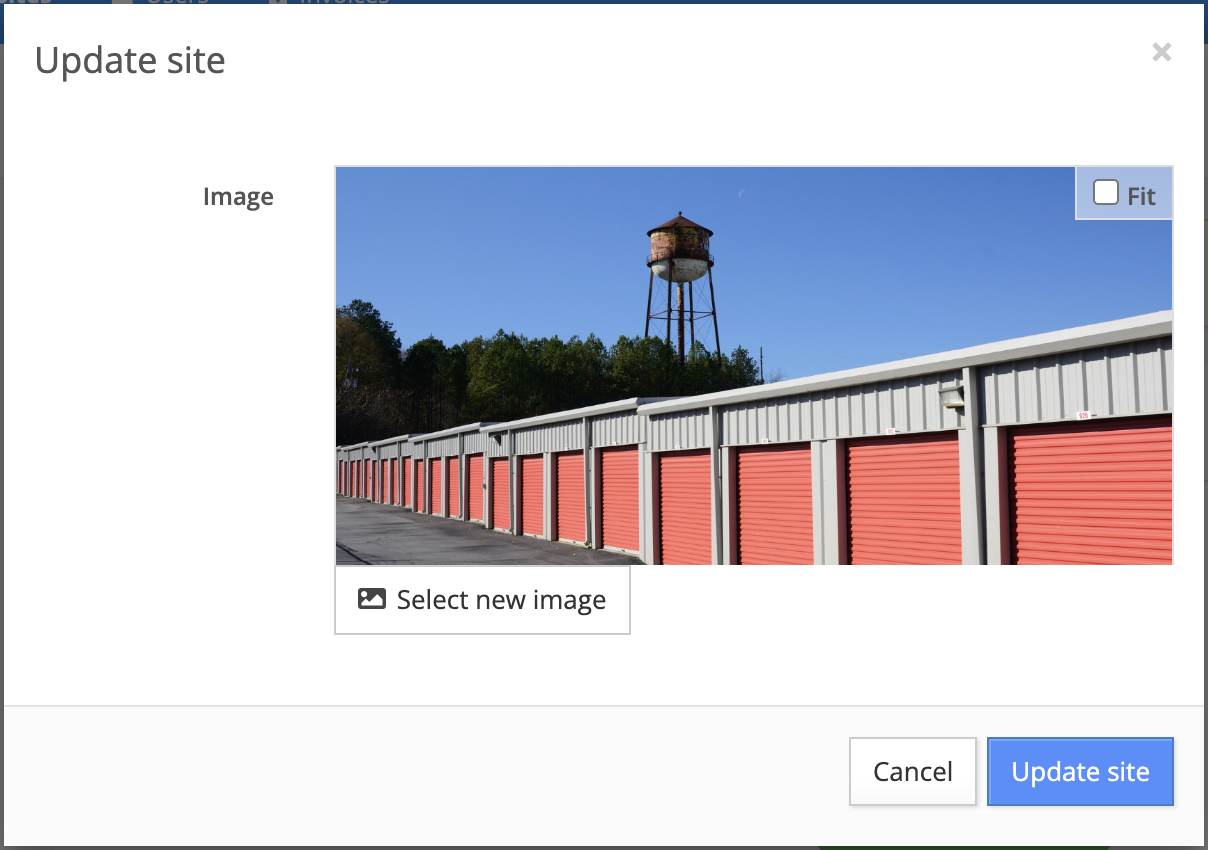
To upload an image for your site, navigate to your Sites settings and hover over the image to display a pencil icon.
Click anywhere in this section to open the file upload window. From here you can click the Select new image button to upload an image file from your device.
Unit type
It is recommended to utilize a different image for each unit type you offer. There is a clearer distinction between the size options when your customers are browsing, and it provides some visual variety in your booking portal.
To upload an image for a unit type, first navigate to your Sites settings and click on the Unit types tab on the lefthand side. Here you will see a list of all unit types in your account. Click on the specific unit type you wish to change the image for, then click the pencil icon in the Unit type details section.
In the window that opens, click the Select new image button to upload a new image. Repeat these steps for each unit type as needed.
Product
To upload an image for a product, first navigate to your Sites settings and click on the Products tab on the lefthand side. Here you will see a list of all products in your account.
Click on the specific product you wish to change the image for. In the window that opens, click the Select new image button to upload a new image. Repeat these steps for each product as needed.
Supported formats
You can upload the following image formats into Storeganise:• PNG – Recommended for images with transparency• JPG/JPEG – Supported for photographs and other image types• HEIC – Supported for uploads from iOS devices; these are automatically converted and resized during upload.Large images (especially from mobile phones) will be automatically resized before upload to improve performance and avoid upload errors.
'Fit' setting
When uploading an image for a site, unit type, or product, you will see a setting toggle labeled Fit:
Enabling this setting will make your image file automatically fit the area so that the entire image is displayed.
Disabling this setting will cause the image to be slightly "zoomed in" which will cause some of the image to be cutoff.
There is a general rule of thumb when deciding if you should toggle the Fit setting on or not:
If your image is a photograph you should turn this setting off.
If your image is an illustration like a graphic design or diagram you should turn this setting on.
If you are using a photograph it is recommended to position the most important part of the image in the center of the frame. For example, if your image is a photograph of the outside of your facility and you want your company sign displayed, try to position it so this content is near the center so it is not cutoff when the picture is zoomed in.
Unchecking the 'Fit' option will make the photograph utilize the full available space which will display better in the customer booking portal.
Brand
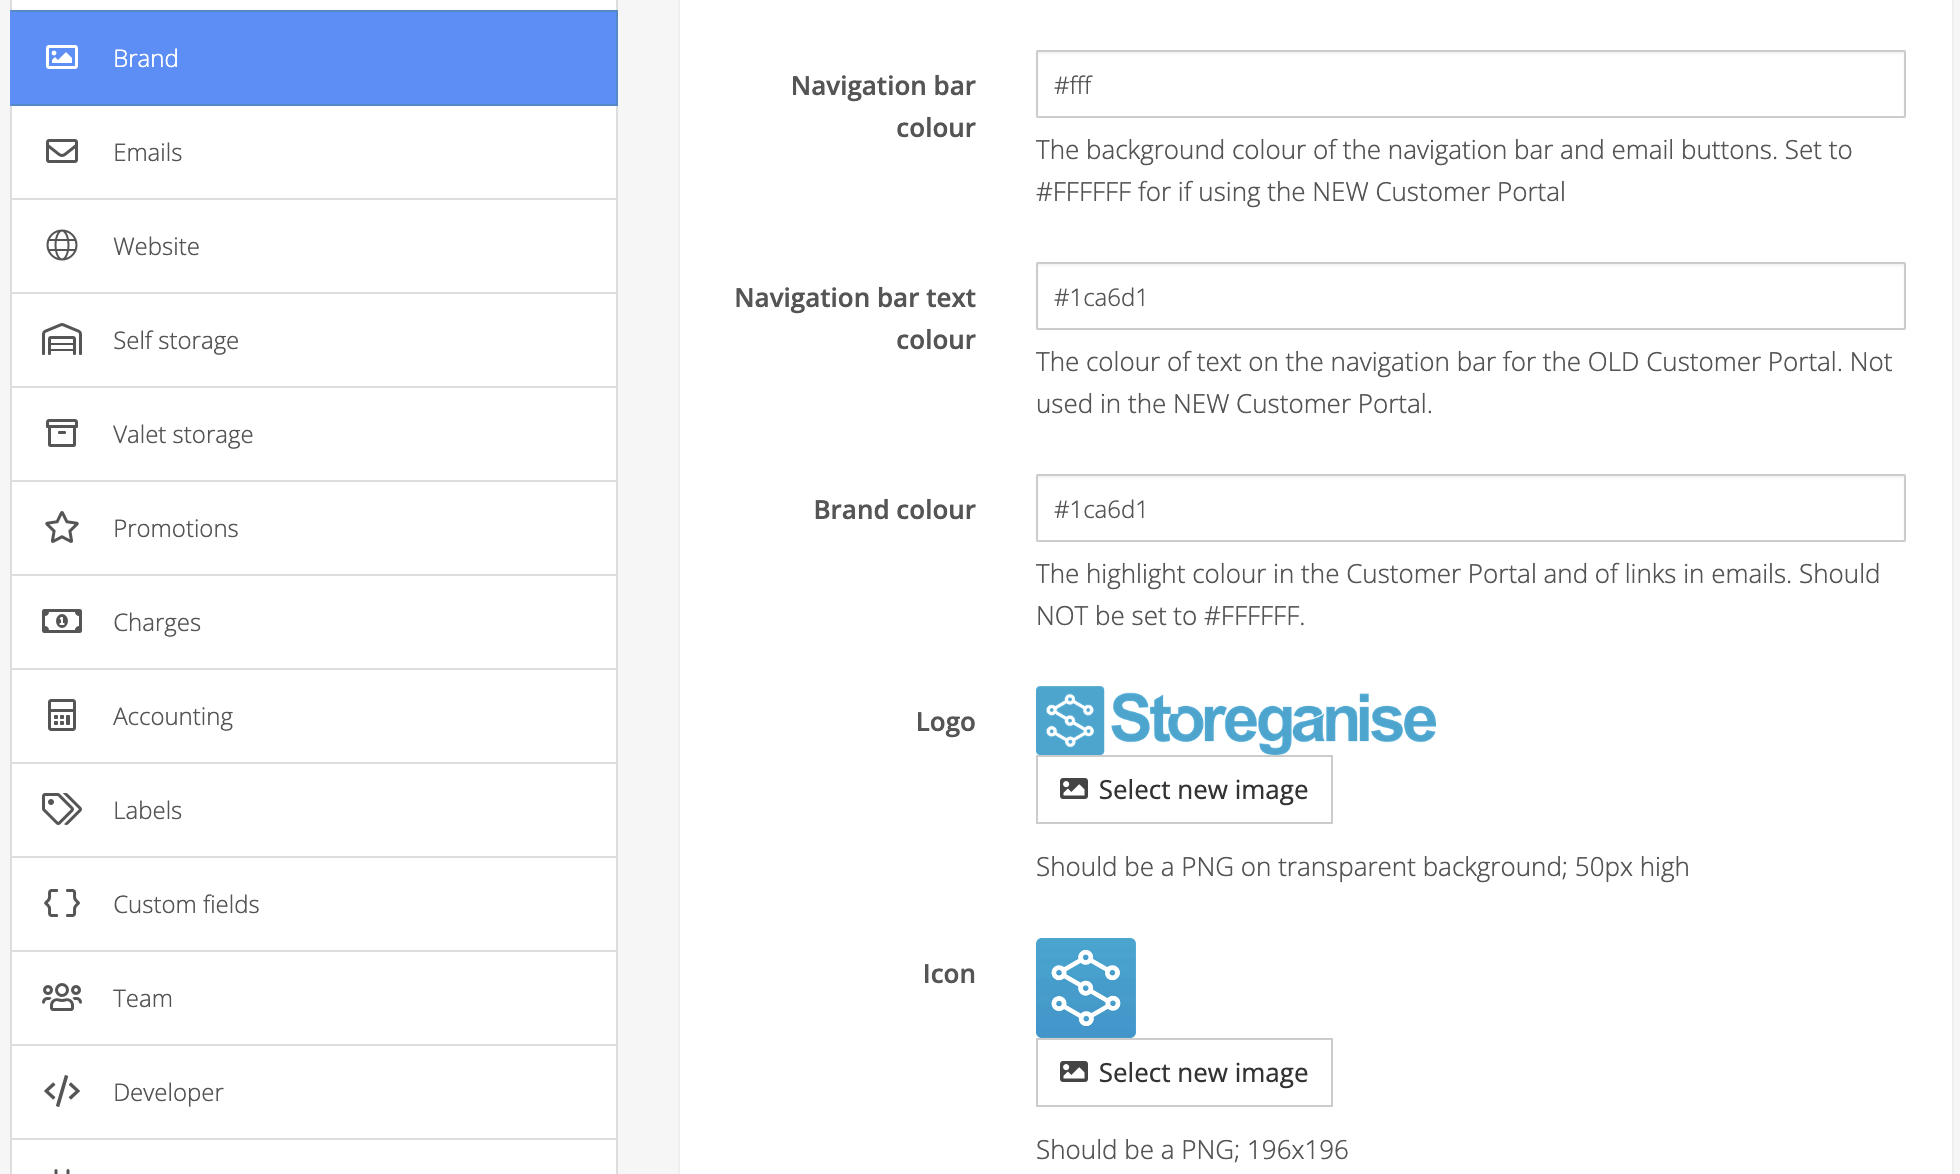
There are 2 images in your Storeganise account that relate to your business as a whole. In particular, it is recommended to carefully design and select your logo image so that it displays optimally throughout your customer-facing presence.To configure your 2 brand images, navigate to your Main Settings and click on the Brand section to upload or update these images.
Logo
The image you select for your brand logo is utilized in some key areas that are customer-facing. As such, it is highly recommended to follow the guidelines below to optimize this visual representation of your business.The logo you select will be displayed in the navigation bar of your customer booking portal:
As well as in the header of your system's email template communications, like invoices and order confirmations:
The following guidelines will help you to get the most out of your brand logo in Storeganise.
The image file should have a maximum height of 50 pixels
The image file format should be either PNG or SVG
The image file should have a transparent background
The image layout should be horizontal and not square
It is common for brand logos to be more square in design, like below:
However, given the maximum height restrictions for this type of application, this will cause your logo to shrink down in size and display poorly:
Note how small both the design and text are
Note that while the logo may appear okay in your management portal, this does not reflect how it will display in customer-facing areas. It is recommended to always check your customer portal and preview your email templates when uploading your logo to see exactly how it will display from your customers' perspective.
This common scenario can be easily resolved by altering your design to create a more horizontally-oriented layout:
Doing so will optimize the display of any design and text that are part of your brand:
Note how much better both the design and text appear when compared to the square design example above
Icon
Your brand icon, AKA favicon, is the image that displays in the browser tab for your customer booking portal.
There are a few simple guidelines to ensure your icon displays favorably.
The image file must be square
The image file dimensions should be 196 x 196 pixels
The image file format should be either PNG or SVG
The image file should have a transparent background, especially if the icon has any blank space (i.e., if it is not perfectly square or has any "empty" space)
 Click anywhere in this section to open the file upload window. From here you can click the Select new image button to upload an image file from your device.
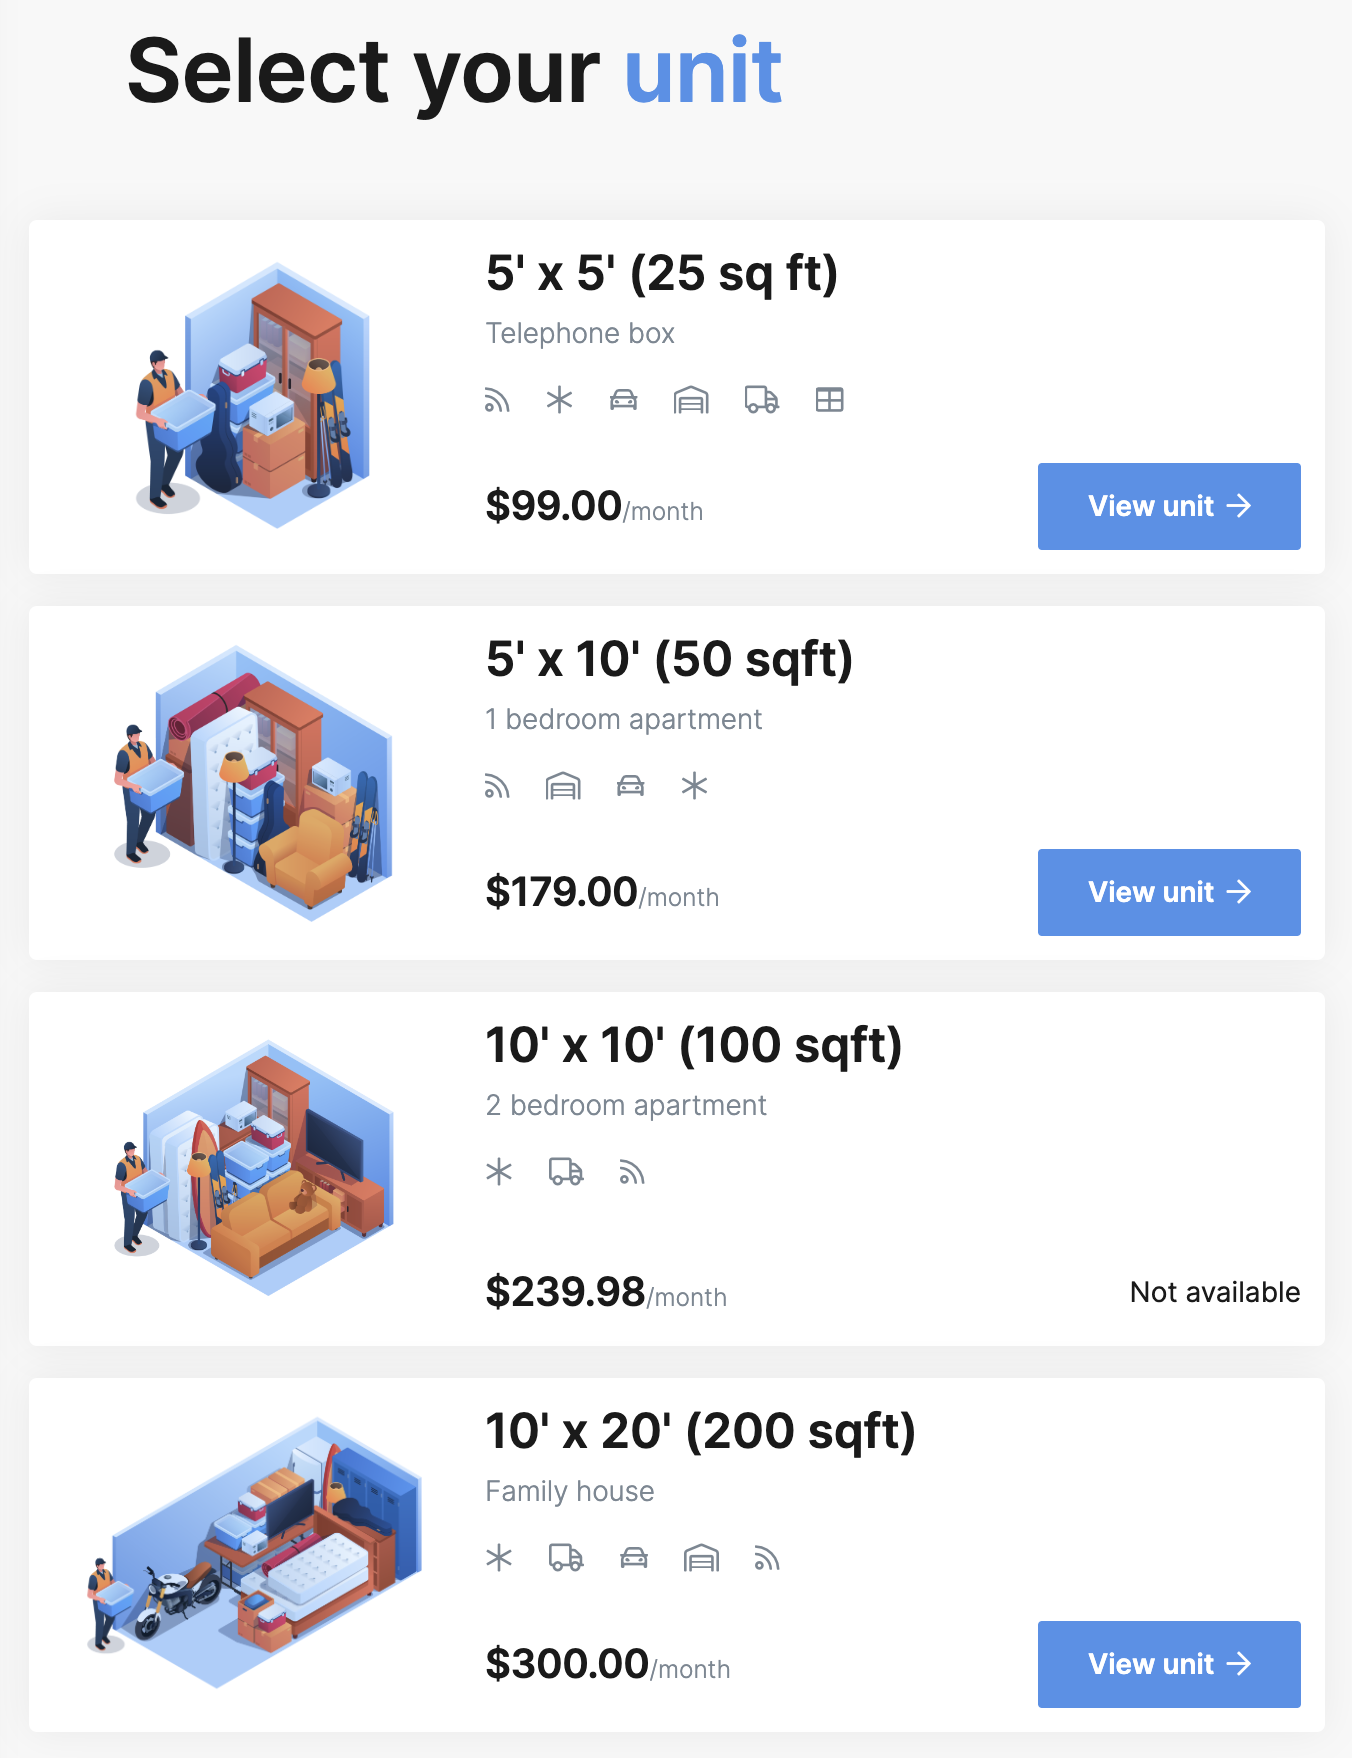 To upload an image for a unit type, first navigate to your Sites settings and click on the Unit types tab on the lefthand side. Here you will see a list of all unit types in your account. Click on the specific unit type you wish to change the image for, then click the pencil icon in the Unit type details section.
 In the window that opens, click the Select new image button to upload a new image. Repeat these steps for each unit type as needed.
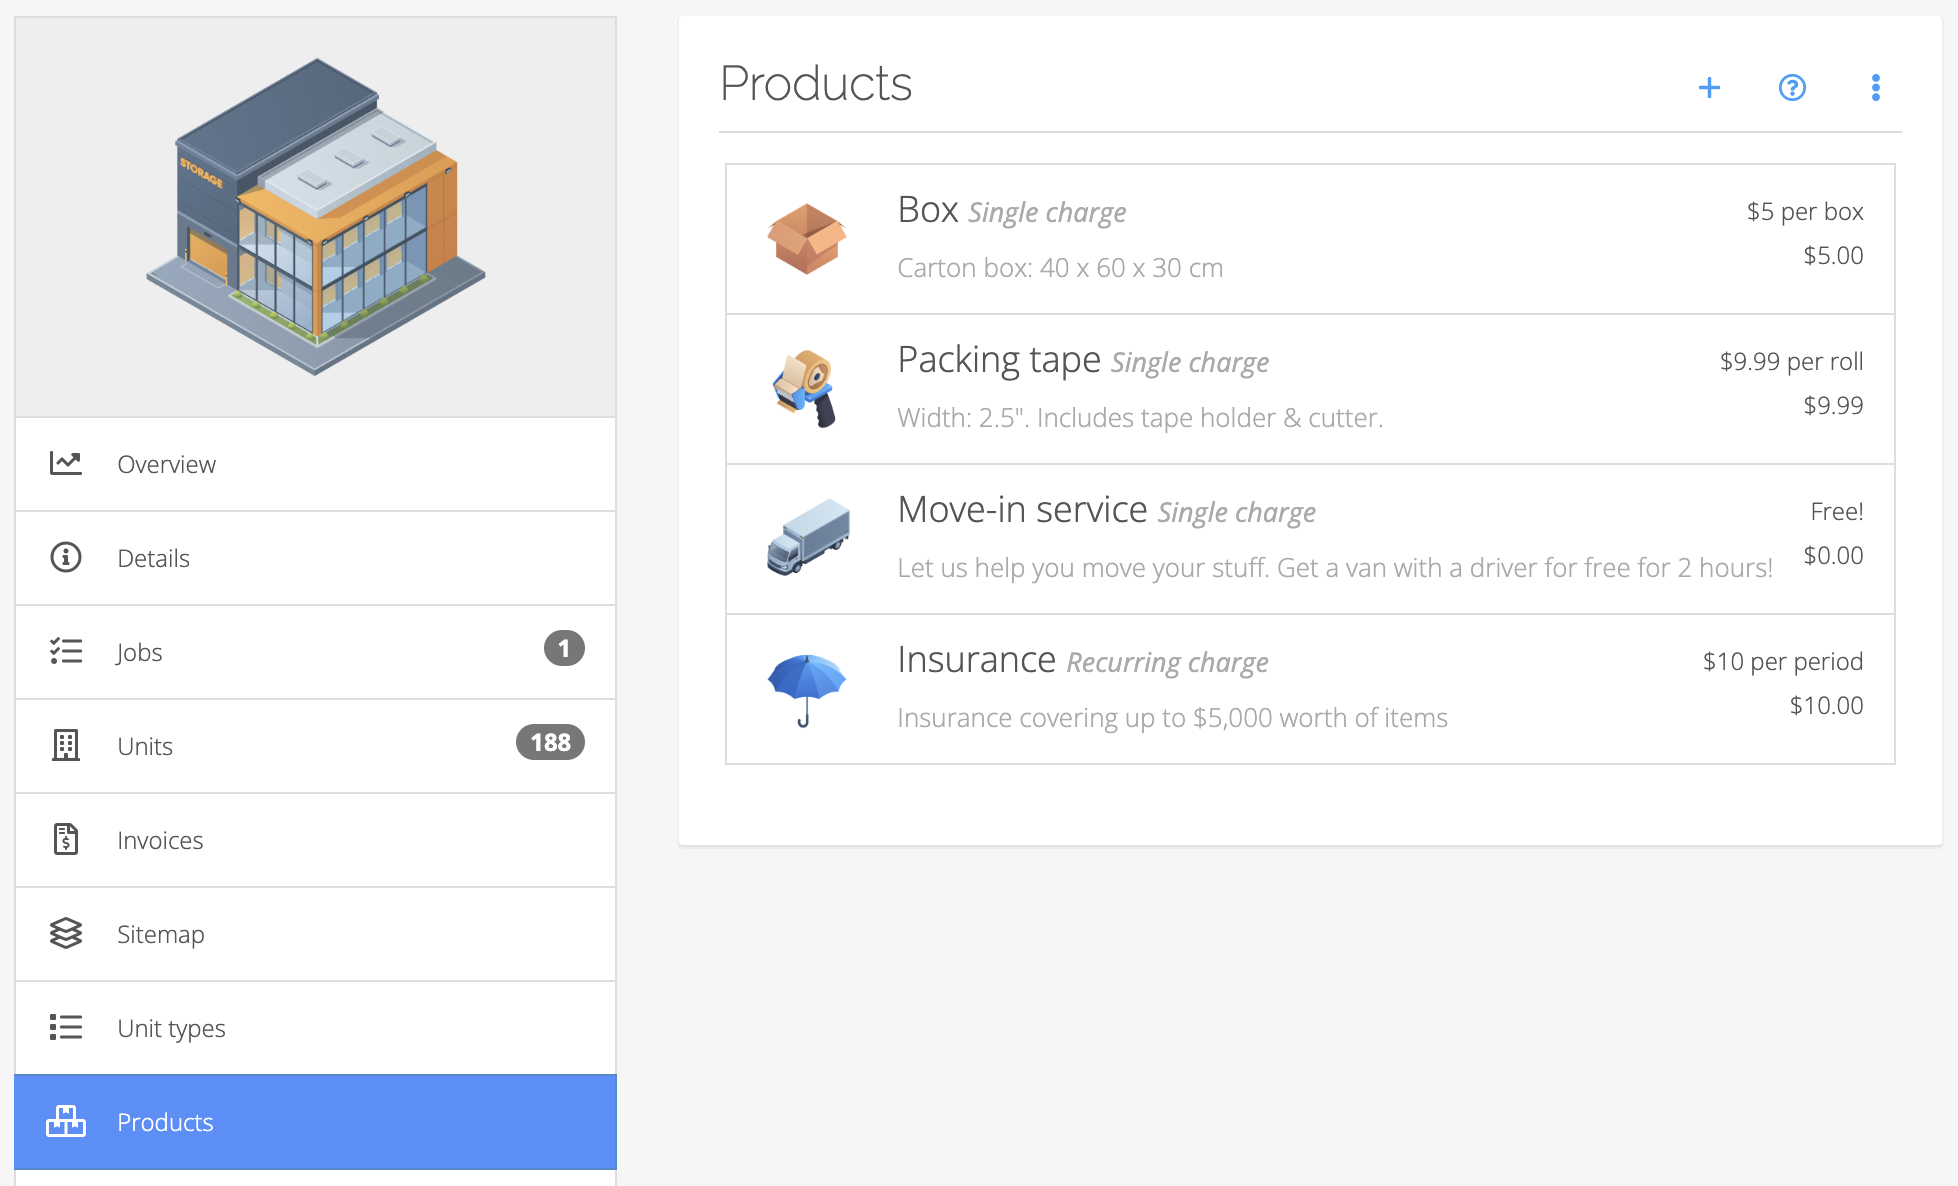 Click on the specific product you wish to change the image for. In the window that opens, click the Select new image button to upload a new image. Repeat these steps for each product as needed.
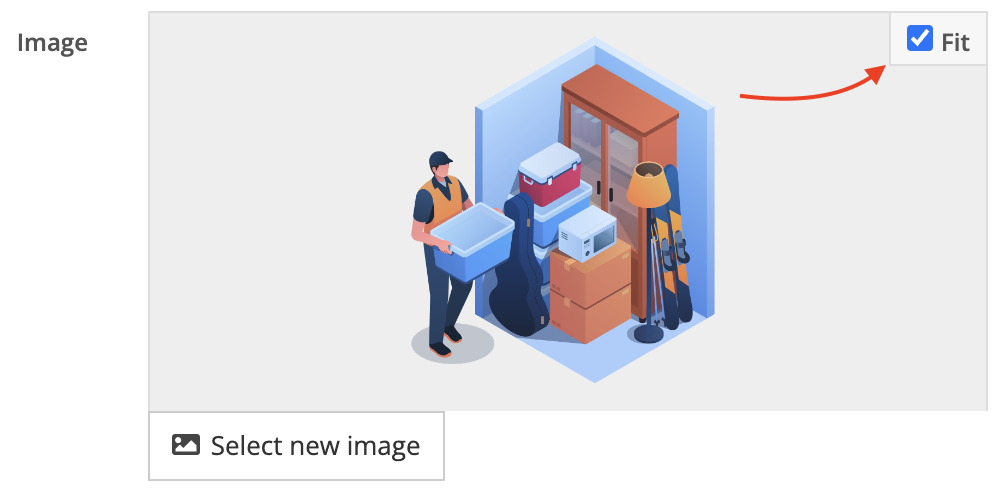
 As well as in the header of your system's email template communications, like invoices and order confirmations:
 The following guidelines will help you to get the most out of your brand logo in Storeganise.
 However, given the maximum height restrictions for this type of application, this will cause your logo to shrink down in size and display poorly:
 Doing so will optimize the display of any design and text that are part of your brand:
 There are a few simple guidelines to ensure your icon displays favorably.