Filter, update, and export items
The Items tab shows all the items that are logged in the system, irrespective of their state, location, type and owner.As with the other tabs, you can filter the data based on different criteria and export the filtered data in a comma-separated value (CSV) file format.If you want to change the number of results loaded on the page, there is a button at the bottom of the page to do just that.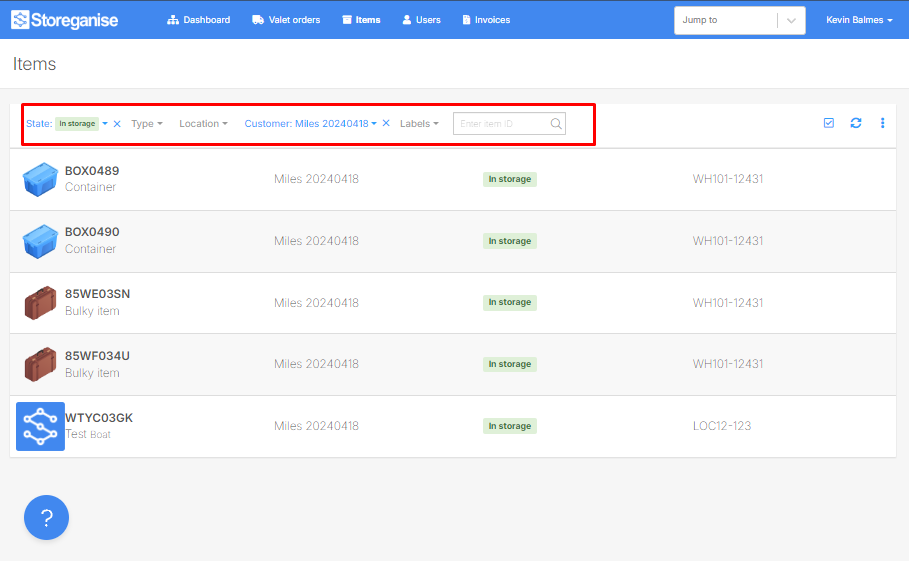

Filters
Data can be filtered according to these filters:- State: Can be any of the following: In storage; In transit (to storage); In transit (to customer); With customer; or Unassigned. Unassigned items are empty boxes that can be used to assign to new valet orders/customers.
- Type: This will be a list of the item types you have set up in your system.
- Location: Every item in storage needs a location set. You can enter a specific location to identify items stored in that specific location. If you have barcode labels assigned to each location, simply scan the location barcode.
- Customer: The user to whom the items are assigned to.
- Labels: Filter by Labels assigned to a particular item.
Bulk update items
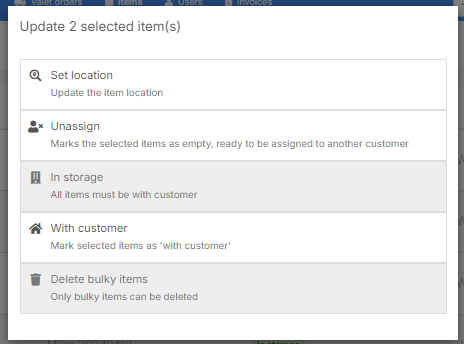
Click on the 🗹 icon to enable the multi-select function. You can then click on the ▢ icon next to each item to select it or the one at the top of the page to select all.Then click on the blue Update button which will bring up a modal offering 5 options to bulk update the selected items:- Set location: This enables you to update the storage location for the selected items by manually entering or scanning the barcode of a new location.
- Unassign: Only boxes can be marked as unassigned.
- In storage: Items in a customer state can be updated to in storage and will require a location ID.
- With customer: Items in storage can be updated with the customer.
- Delete bulky items: Bulky items that are with the customer can be deleted (they cannot be deleted when in storage).
Export
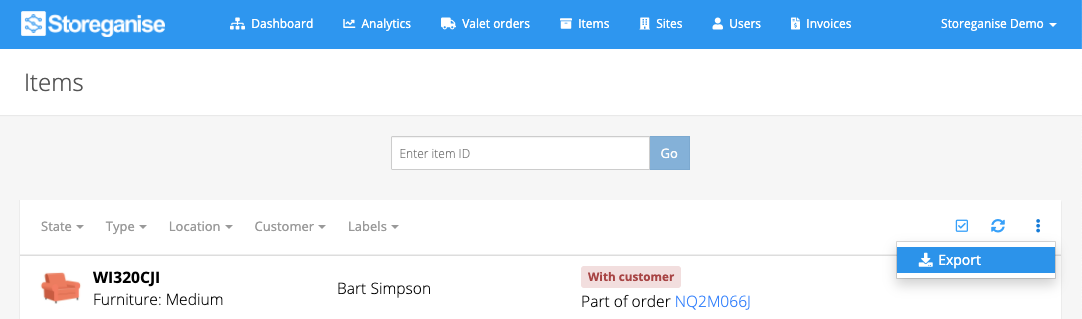
Click on the ⠇ icon on the top right of the page and select Export to generate a csv file export of the items based on the filters applied. Once the file is generated, you'll see this become a green "Click to download" button.Search
Use the text box at the top of the Items tab to jump to the item details page of a specific item ID. Scan the item's barcode or enter the ID manually.Jump to
Related articles
Adding and editing item types & products
Valet Order Step: Pick empty boxes or items
Boxes and bulky items information
Removing items from completed valet orders