Add-on: Spiderdoor access control
The Spiderdoor Add-on in Storeganise enables seamless integration with Spiderdoor's access control system for efficient and automated facility management.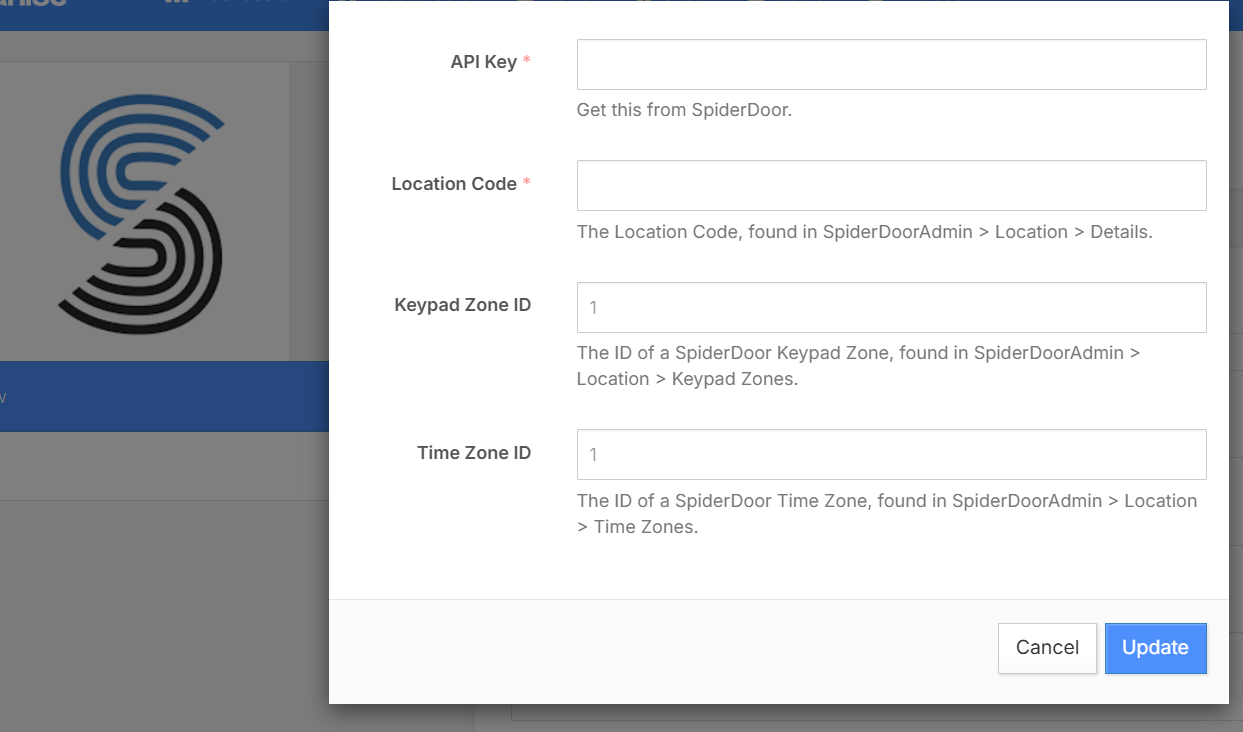
Please note: This documentation is for demonstration purposes. Currently, all Add-ons must be installed by a Storeganise team member. Contact us to install an Add-on. If your Add-on is already installed and enabled, you can skip to the "How the Add-on works" section.
Setting up the Spiderdoor Add-on
Enable the Add-On
- Navigate to Sites > [Your Site] > Add-ons> Spiderdoor.
- Contact support to have the Add-on installed if it’s not visible.
Configure the Add-On
- During setup, provide the following:
- API Key: Obtain this from your Spiderdoor account and enter it into the configuration.
- Location Code: Provide the location code for your site. This code will be used to synchronize Storeganise with Spiderdoor.
Activate the Add-On
- Once the setup is complete, enable the Add-on in Storeganise.
- Inform Spiderdoor to activate the location by providing the ID created during setup (typically the same as the Site ID).
How the add-on works
Access codes and synchronization
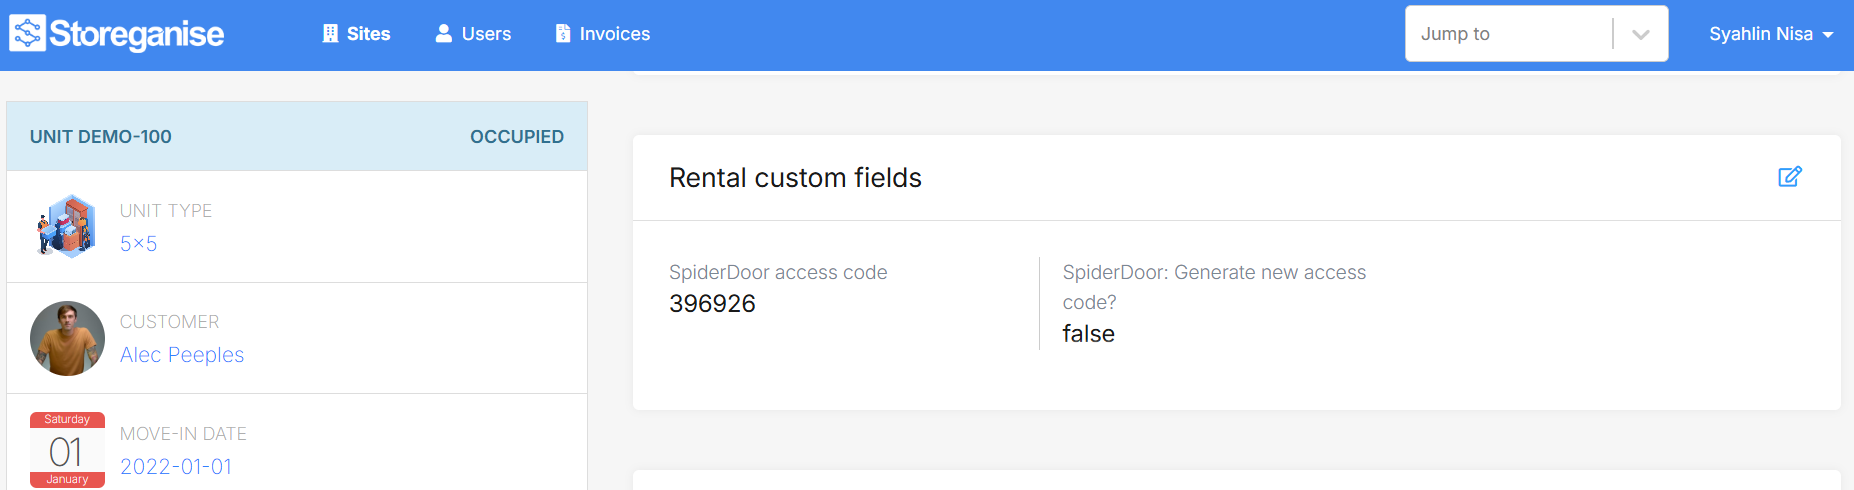
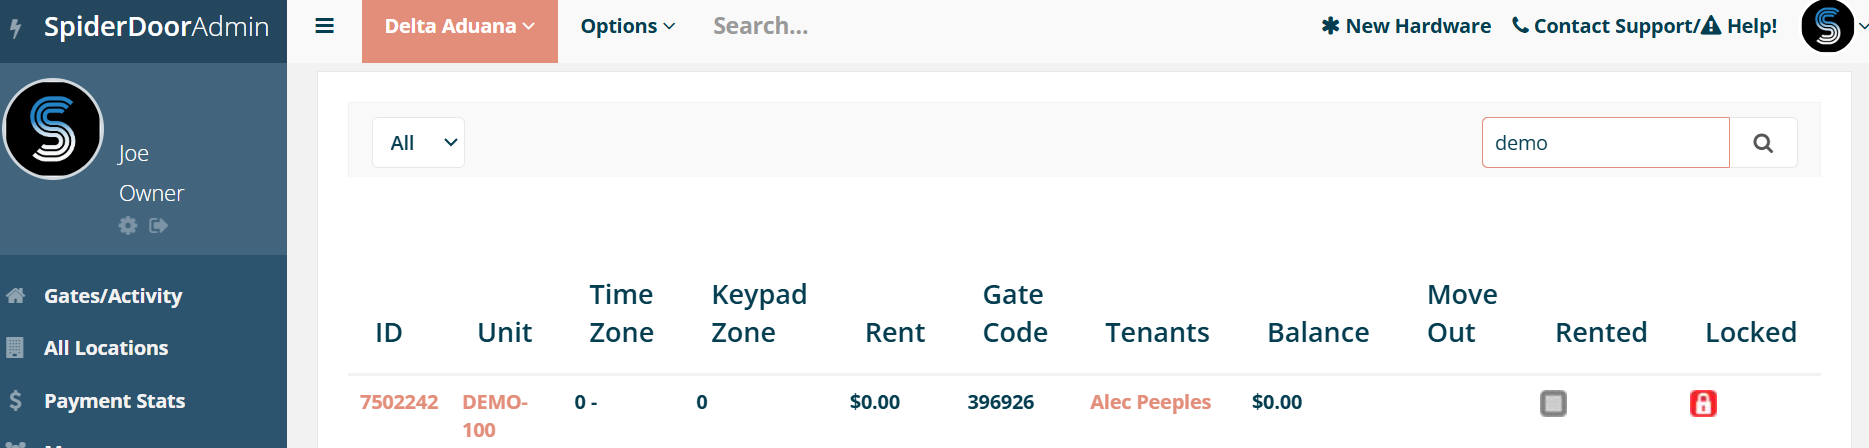
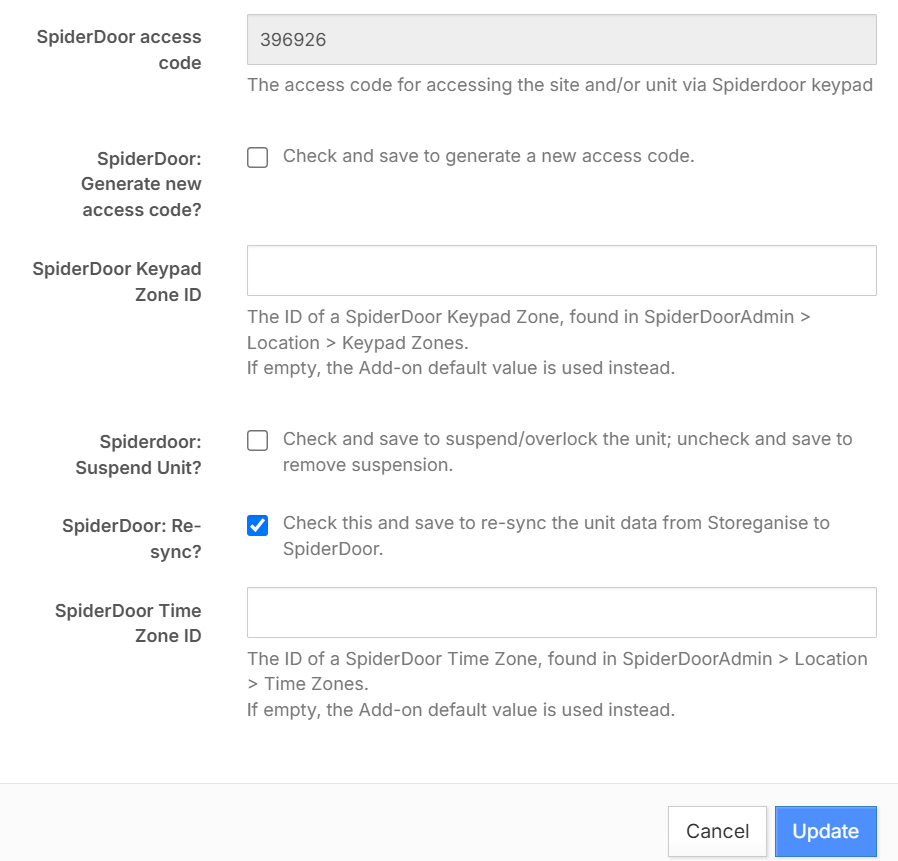
- Access Codes: Spiderdoor automatically generates access codes during customer move-ins and assigns them to the relevant units.
- Unit Creation: Units in Spiderdoor are automatically created during the move-in process if they don’t already exist.
Move-ins
When a customer rents a unit:- The unit is created in Spiderdoor (if not already present).
- An access code is generated and assigned to the customer.
- The unit’s status is updated to "occupied" in both systems.
Move-outs
When a customer vacates a unit:- The unit’s status is updated to "empty."
- The access code is removed, revoking customer access.
Overlocking units
If a payment is overdue:- The unit is flagged as "locked" in Storeganise.
- Spiderdoor updates the unit’s status to "locked," preventing access.
- Once payment is cleared, the unit is unlocked, and the same access code is reactivated.
Spiderdoor-specific configurations
Keypad zones and time zones
- Keypad Zones: Define areas where an access code will open (e.g., "Floor 1," "Main Entrance").
- Zones are created automatically during the setup process or dynamically during updates.
- Time Zones: Specify the hours during which access is allowed (e.g., "8 AM to 5 PM on workdays").
- Default setups typically use numerical identifiers (e.g., 0, 1, 2).
Troubleshooting
Sync delays
Access changes may take a few seconds to reflect. Refresh the Spiderdoor dashboard to confirm updates.Access errors
Ensure that:- Unit names in Storeganise match those in Spiderdoor.
- Required fields (e.g., API key, location code) are correctly configured.
Manual synchronization
If discrepancies occur:- Go to the Unit Rental page in Storeganise.
- Navigate to Rental Custom Fields > Check Spiderdoor Resync and trigger a manual sync.