How to set up Google Tag Manager custom styles
A guide to set up custom CSS styles on your Storeganise website or user portal.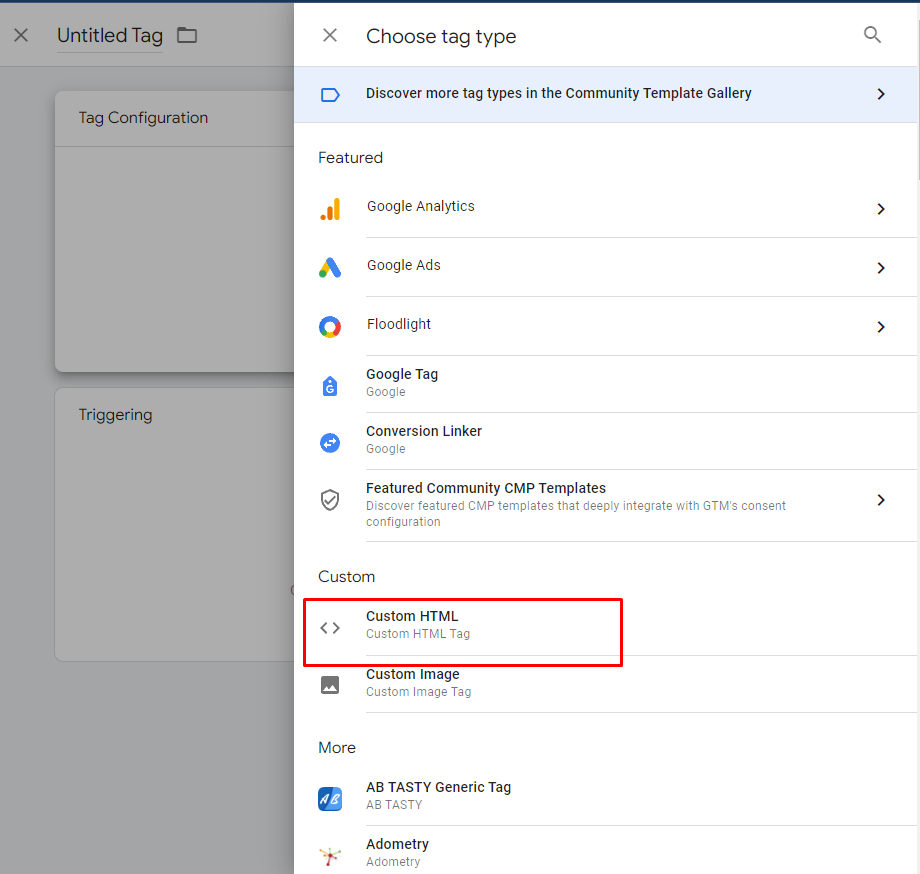 Now you will be able to add your custom HTML code to change CSS styles.After you write your custom code, scroll down and click on the Triggering field and chose All pages to trigger this tag on all pages in your container.
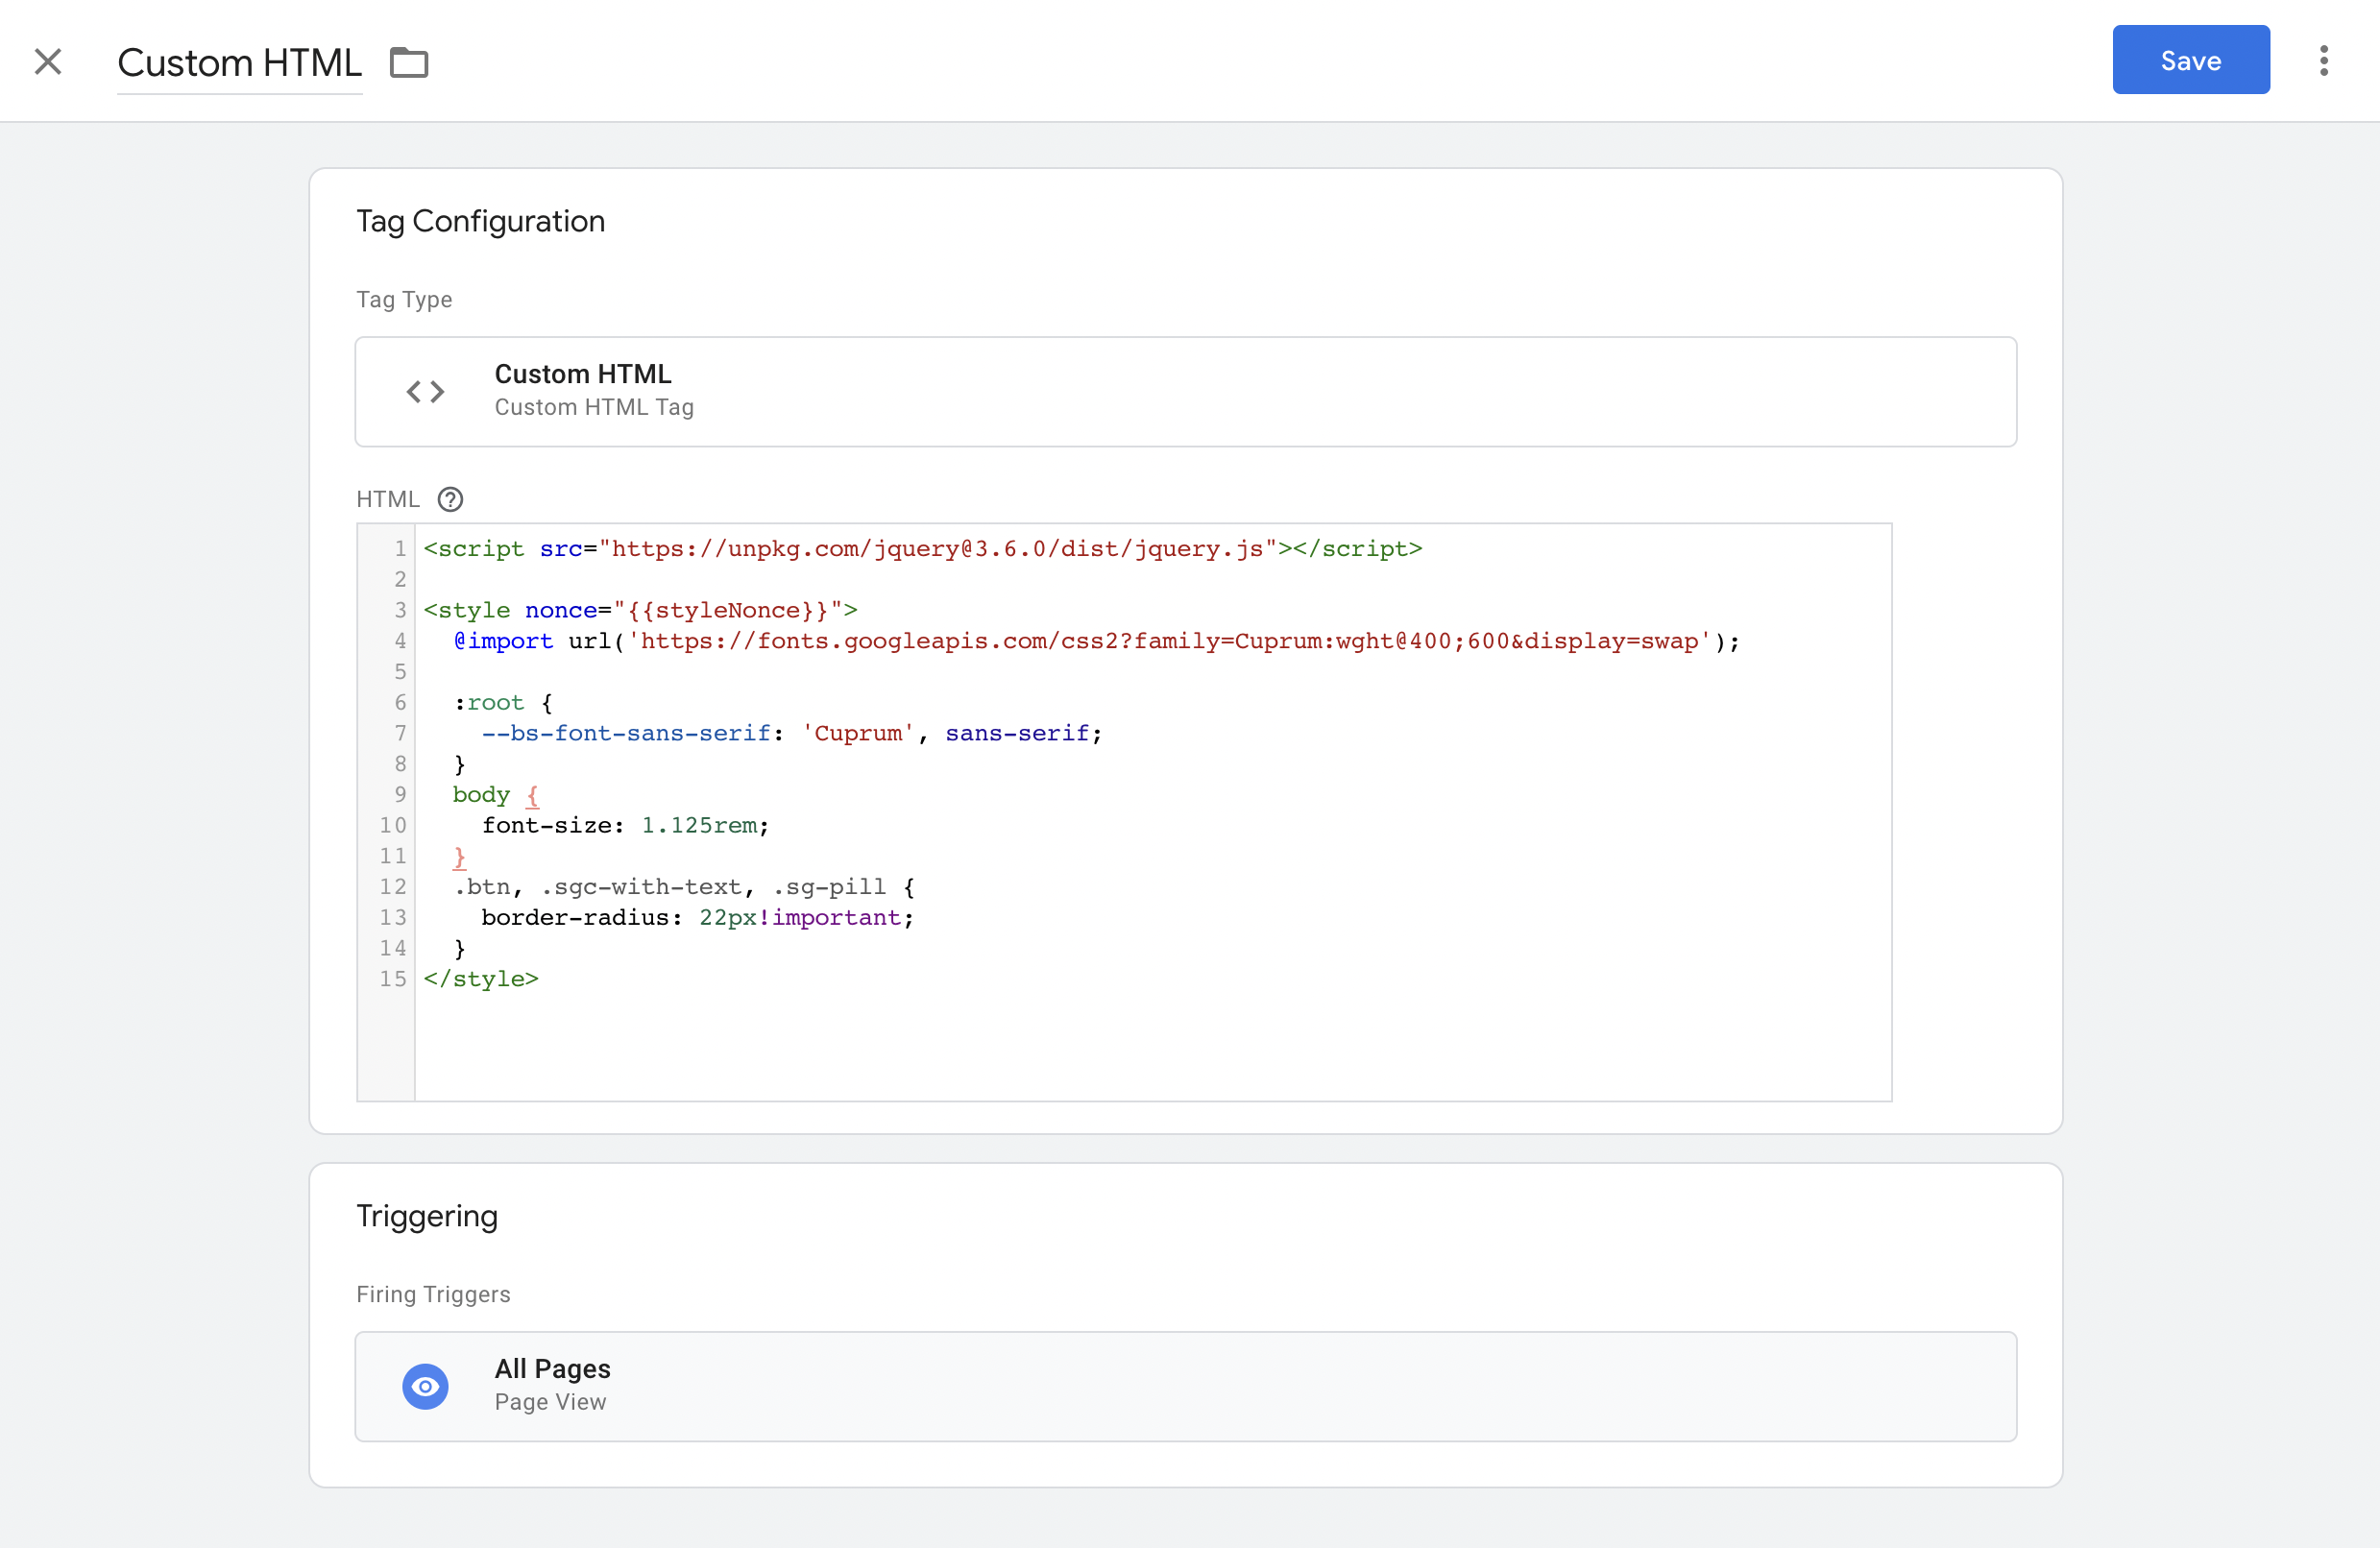

 WARNING: This will activate your custom styles. Your visitors will be able to see the new styles as soon as you publish them. Please test your styles before publishing the changes.
Storeganise does not offer support for GTM use or guarantee that any custom GTM code will work within Storeganise. Additionally, periodic updates to the Storeganise API could impact or even break how custom GTM code works. Please note also that many users may not see changes made via GTM due to the widespread use of ad-blockers.
Resources
You need to have Google Tag Manager(GTM) installed and configured and connected to your Storeganise Customer portal. If you don't have GTM installed, please read the following articles by Google or consult with your web development team.- support.google.com: Set up and install Tag Manager
- Using a "nonce" tag in your custom CSS
- How to connect Google Tag Manager to your Storeganise account
Overview
Storeganise allows you to customize the appearance of your marketing page or your customer portal with custom CSS styles. You can insert your own custom CSS styles via Google Tag Manager, using a "nonce" attribute.The nonce attribute is useful to allow-list specific elements, such as a particular inline script or style elements.Add a custom HTML tag in Google Tag Manager(GTM)
Now log in to your GTM account where you can set up your tag that includes custom HTML.Click on Tags in the left menu, click on New button in the main window and click on the Tag Configuration field. Now scroll down and select Custom HTML tag.Using "nonce" attribute
You probably noticed the nonce attribute on the <style> HTML element, this is required in our customer portal Content Security Policy to display your styles properly, for security reasons.
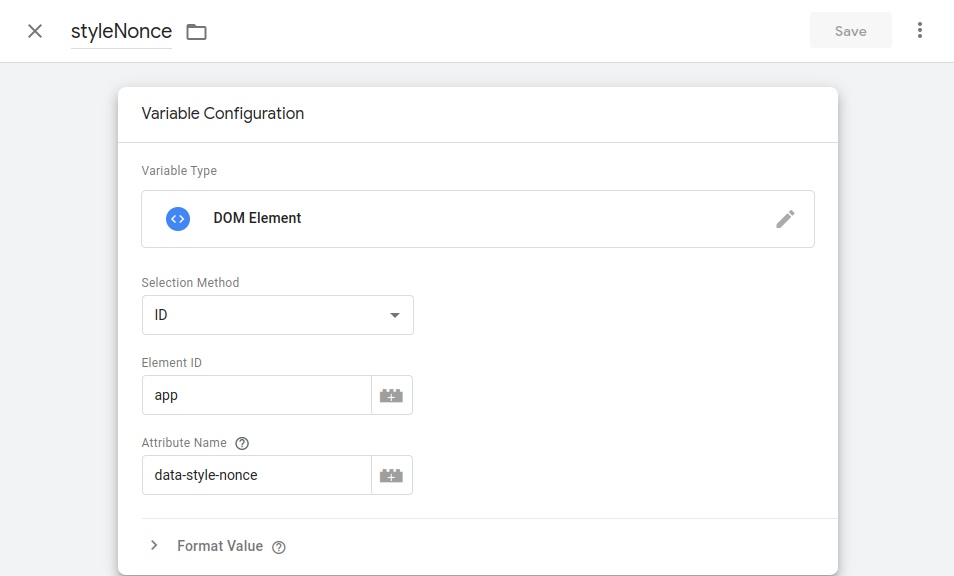
Create a GTM Variable named "styleNonce" with the type: DOM Element, selection method: ID and attribute name: data-style-nonce
Testing your changes in Preview mode
Your custom styles should now be ready. Once you publish your changes, the new style will be visible to visitors right away so it's always a good idea to test it in the preview mode.Click on the Preview button in your Google Tag Manager workspace and enter the URL of your website. A new window with your website will open. If everything is set up correctly, you should be able to see the changes you made.
Publish your changes in Google Tag Manager
After you have made your changes, you can submit your changes in your GTM container and publish it.
Jump to