Add-on: Nokē access control
Note: Currently, all Add-ons must be installed by a Storeganise team member. Contact us to have this Add-on installed.
Setting up the Nokē Add-on
Note: The demo below is interactive.
- Reach out to Storeganise Support to request the Add-on to be installed.
- Once installed, in your Storeganise admin dashboard, navigate to Sites > [Your Site] > Add-ons.
- Open the Add-on settings by clicking on the pencil icon, then input your Nokē site ID and Country code in the relevant field.
- In the Storeganise admin dashboard, go to the site where the Add-on is installed.
- Navigate to Units and click the + icon to add a unit. To add multiple units, use the import template.
- After adding, click the three dots > Export, and include only these columns:
ID,SiteID,customFields.noke_id, andsite code. - Open the exported CSV and copy the ID into the
customFields.noke_idfield (it’s blank by default). - Send the updated file to Nokē Support and request that they add the units.
- Once Nokē confirms the units have been added, access the unit you just added and paste the corresponding
customFields.noke_idvalue, and click Update.
Move-in process
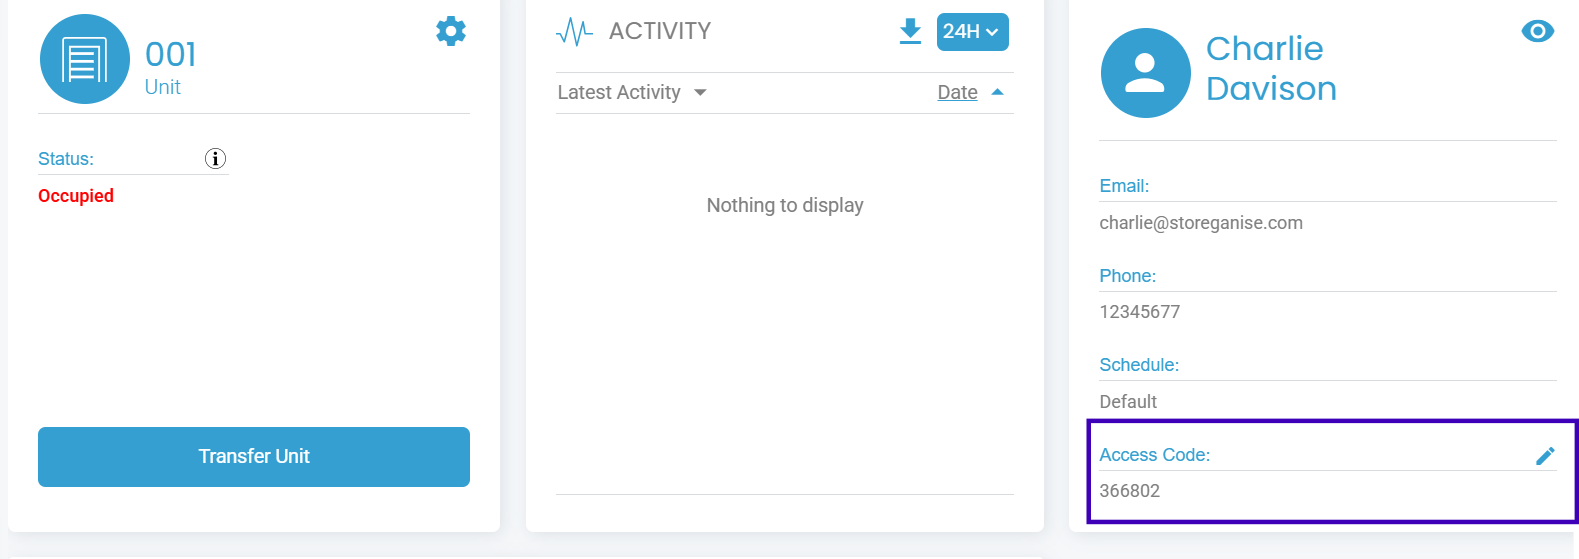
When a customer moves into a unit, the Gate Access Code is automatically generated and assigned to the customer in the unit rental details. This code is synced with Nokē, allowing the customer to access the assigned unit via the Nokē lock system.Viewing Access Codes:You can view the assigned Gate Access Code under the unit rental details in Storeganise.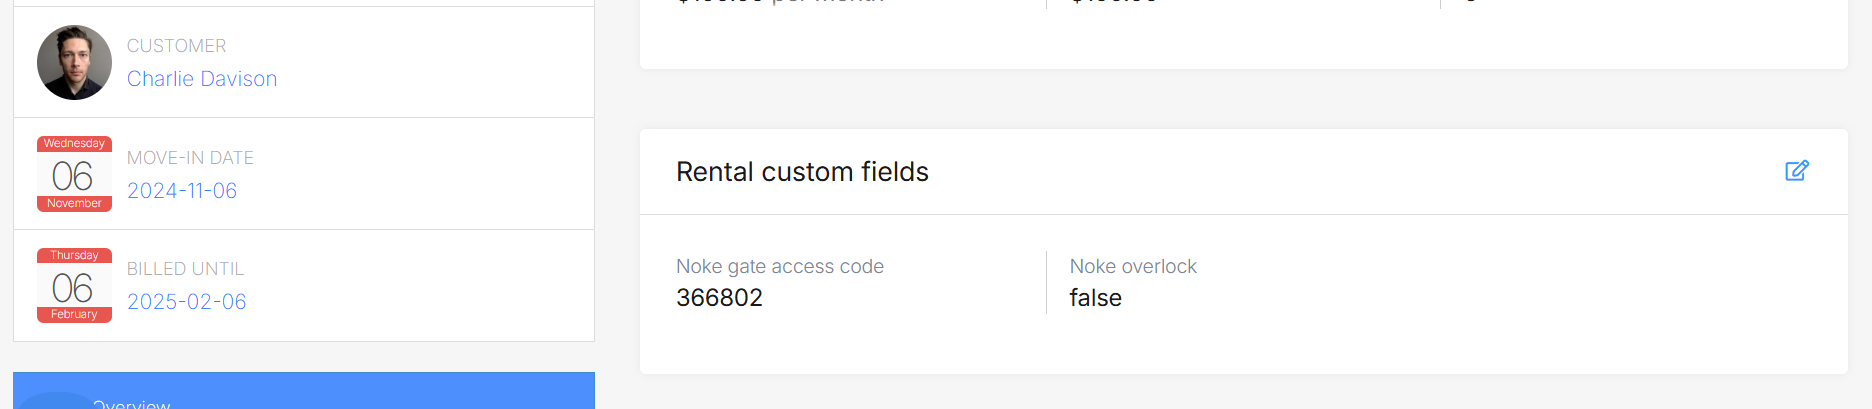
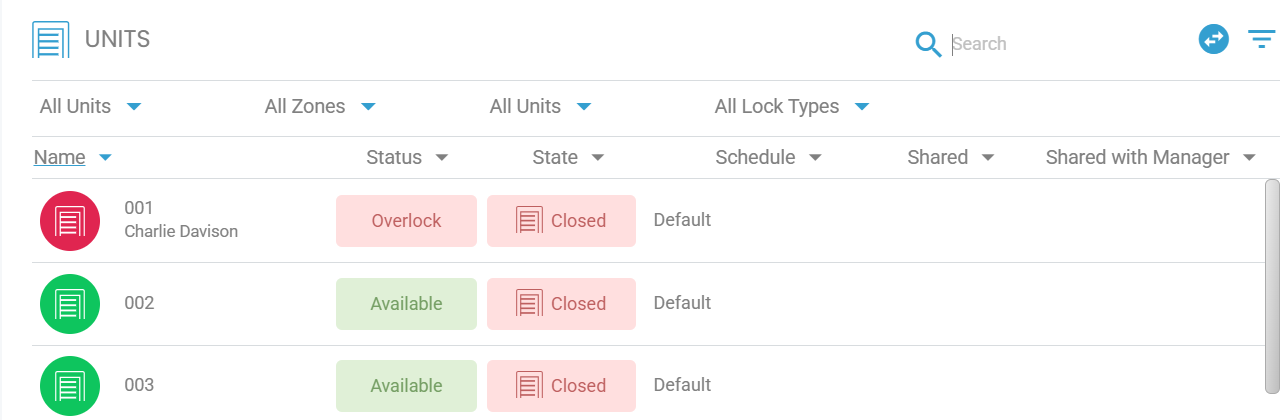
Overlocking units
Units will automatically be overlocked when they're overdue. Additionally, you can manually overlock a unit by navigating to the occupied unit in Sites > [Your Site] > Units. Edit the unit rental details and enable the Overlock option.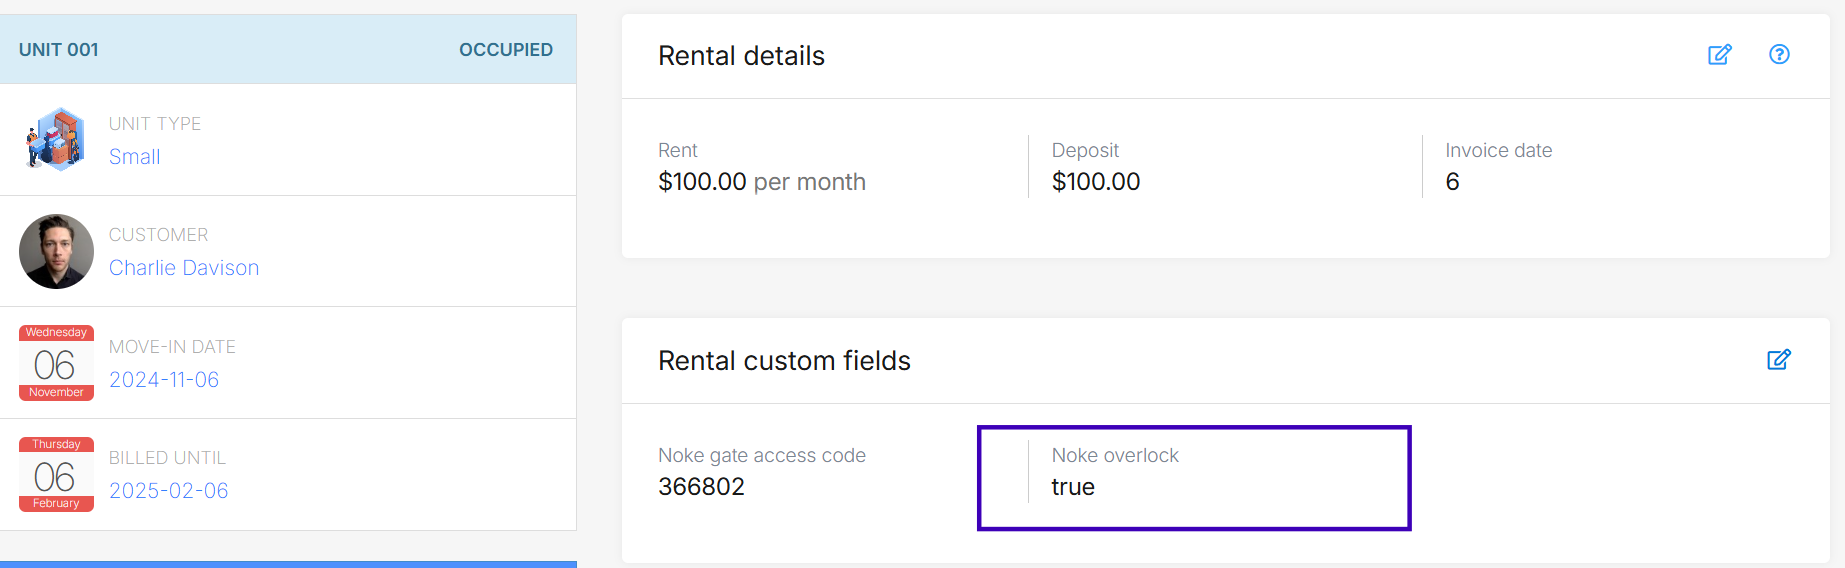
Note: The demo below is interactive.
Troubleshooting
Missing Access Codes: Ensure that the Unit IDs in Storeganise are the same as the ones on the Nokē dashboard, and Site ID are correctly configured.Sync Issues: Allow a few seconds for updates to reflect in Nokē. If issues persist, check your Nokē integration settings or contact support.Jump to