Integrating Cybersource
Storeganise uses the Secure Acceptance Hosted Page Checkout integration method for Cybersource
In order to integrate with Storeganise, your Cybersource account must have TMS, or Token Management Service, enabled. Contact Cybersource support to have this service enabled on your account prior to setting up the Storeganise integration outlined in this article.
TIP: If you see the setting tab 'Token Management' in your Cybersource account sidebar, this typically indicates this service is already enabled for your account.

- Click "+ Generate key"
- Choose REST - Shared Secret
- Click "Generate key" button and download the 2 keys shown:
YOU CANNOT VIEW THE 'Shared Secret' KEY AFTER THIS STEP
Make sure that you click the 'Download key' button to save this information.
If you do not record this information you must delete the REST key and this step will need to be repeated.
- Click '+ New profile'
- Enter a 'Profile Name' of your choosing
- Select 'Hosted Checkout'
- Enter your 'Company Name'
- Set 'Payment Tokenization' to ENABLED
- Click 'Submit'

- GENERAL SETTINGS
- Integration methods: Hosted Checkout
- Added Value Services: Payment Tokenization Enabled
- PAYMENT SETTINGS
- Card Type: Click 'Add card type' and select a card type (e.g., Visa)
- CVN: Toggle on 'CVN Display' and 'CVN Required'
- Currencies: Select the currencies for your business
- Scroll to the bottom and click 'Submit'
- Repeat these steps for each desired card type
- You can enable Card Detection if it's supported
- SECURITY
- Click 'Create key'
- Enter a 'Key Name' of your choosing and click 'Create'
- Copy and save the Secure Acceptance Access Key and Secure Acceptance Secret Key
- PAYMENT FORM
- Payment Form Flow: Select 'Single Page Form'
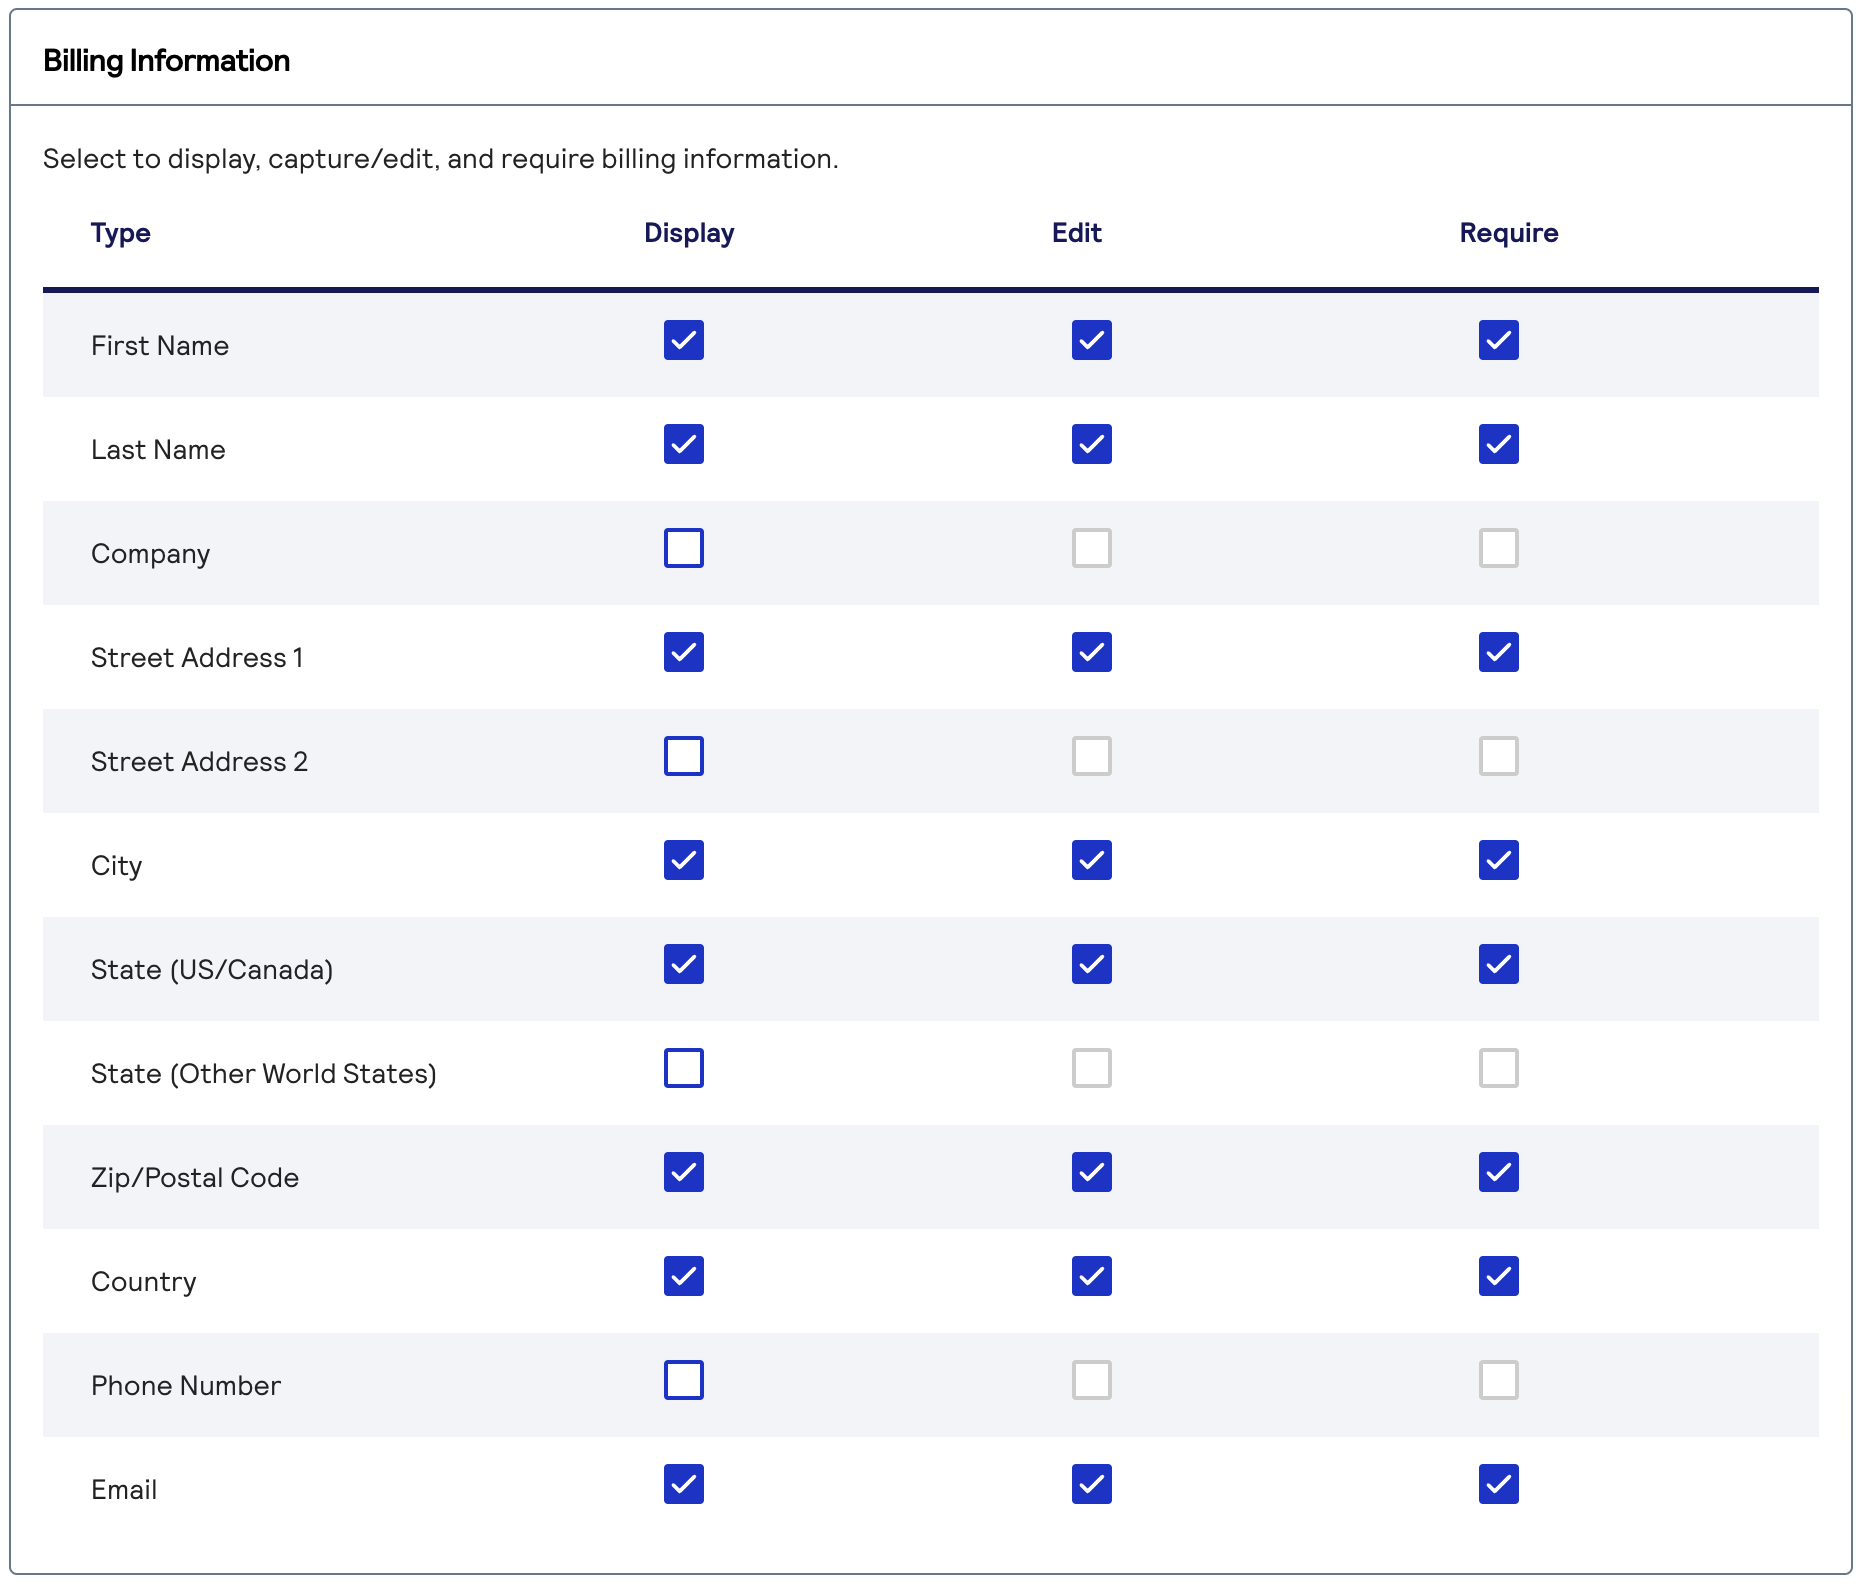
- Checkout Steps: Enable 'Billing Information'
- Billing Information: Toggle on 'Display', 'Edit', and 'Require' for each of the following fields:First NameLast NameStreet Address 1CityState (US/Canada)Zip/Postal CodeCountryEmail
- Order Review:Shipping Information: Toggle on 'Display' and 'Edit'
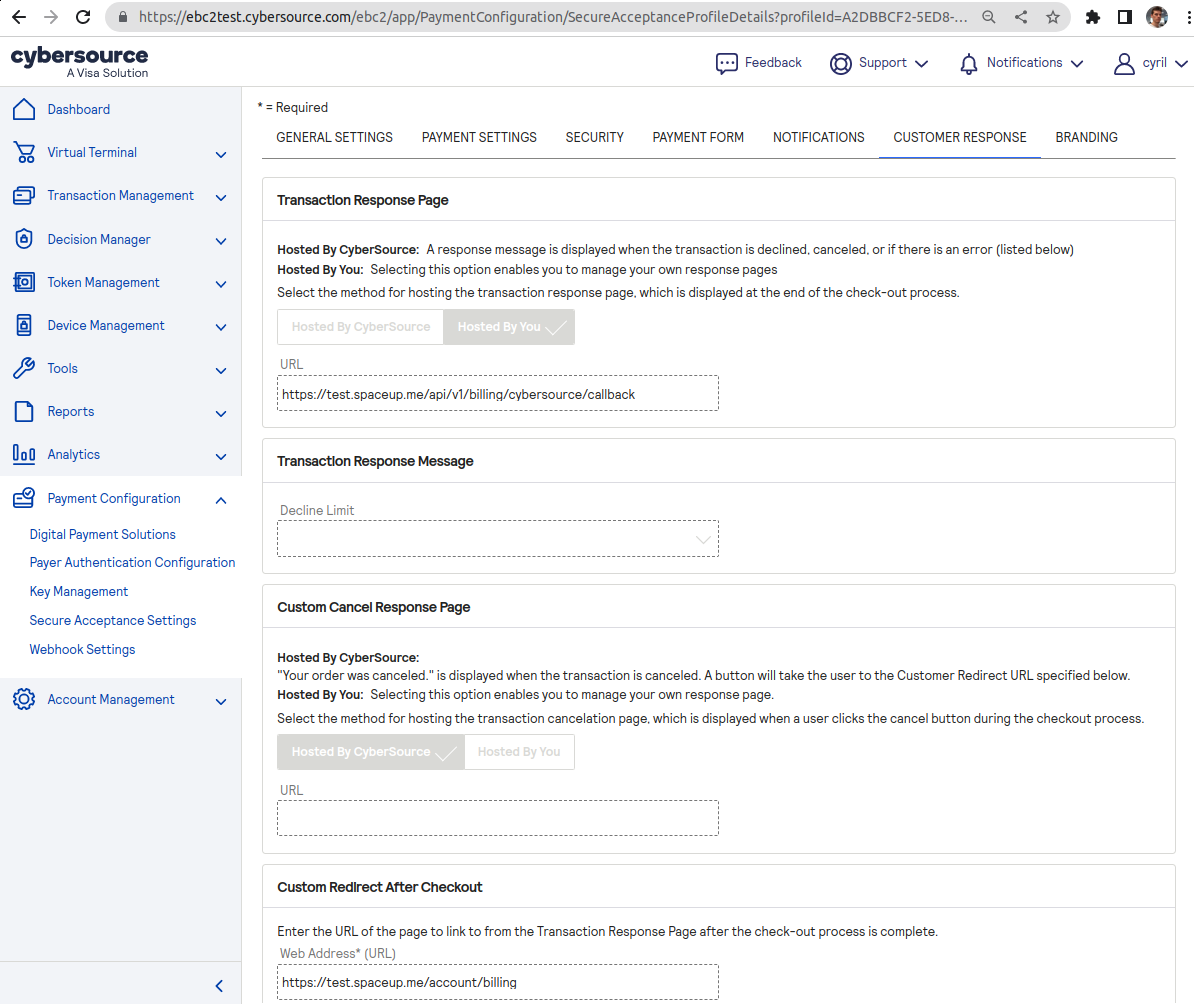
- CUSTOMER RESPONSE
- Transaction Response Page: 'Hosted By You'
- URL: https://{sg-code}.storeganise.com/api/v1/billing/cybersource/callback where {sg-code} is your Storeganise account name
- Custom Redirect After Checkout: set URL https://{sg-code}.storeganise.com/account/billing (this is the default redirect URL and also the cancel URL)

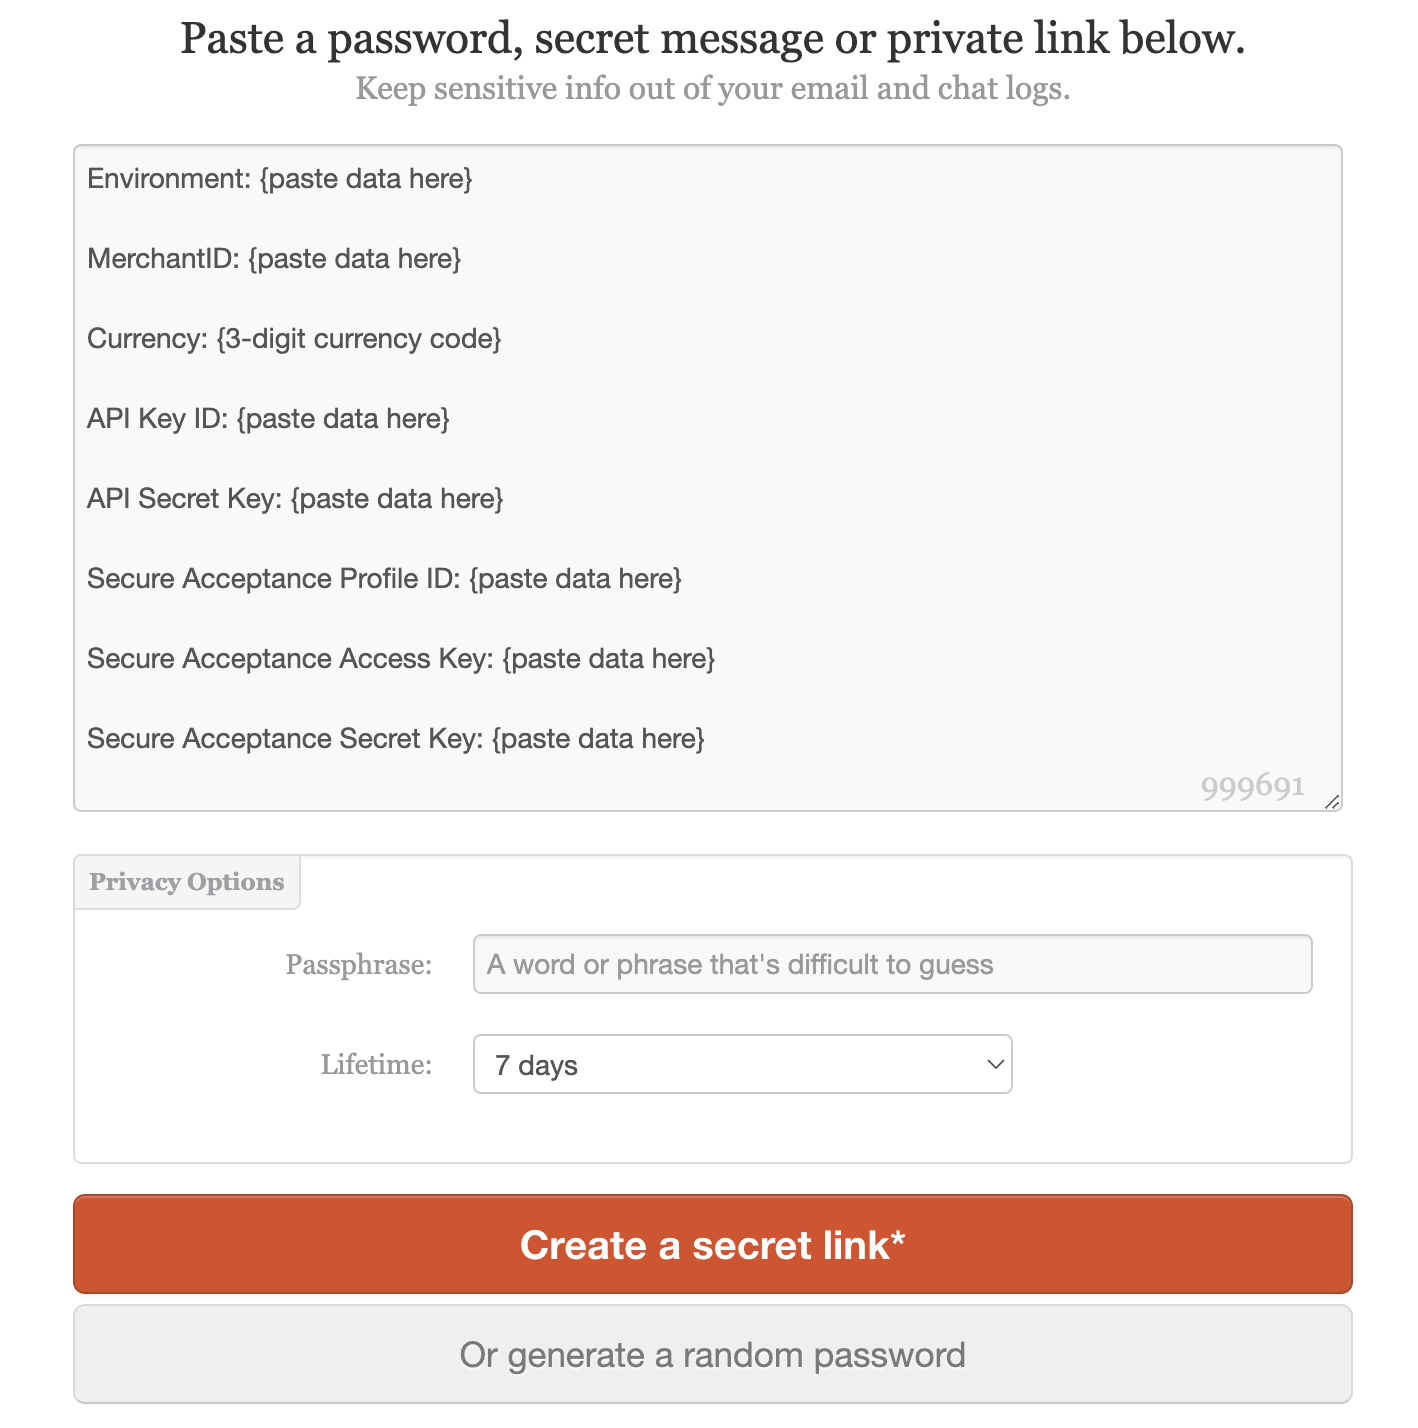
- Environment (Test, Production or ProductionIndia)
- Merchant ID (found in a banner at the top of your Cybersource dashboard)
- Currency (currency code e.g. EUR)
- API Key ID
- API Secret Key
- Secure Acceptance Profile ID
- Secure Acceptance Access Key
- Secure Acceptance Secret Key
Using Cybersource in a custom configuration
- GET /v1/billing/cybersource/sources - list available payment methods- POST /v1/billing/cybersource/session - returns{ action: String, data: Object } to be used in a form for starting the checkout flow, as shown below:const session = await fetch('https://spaceup.storeganise.com/api/v1/billing/cybersource/session?successUrl=' + encodeURIComponent(location.href), {
method: 'POST',
// credentials: 'include', // if using cookies
headers: { authorization: `Bearer ${accessToken}` },
}).then(r => r.json());
const form = document.createElement('form');
form.action = session.action;
form.method = 'POST';
form.append(
...Object.entries(session.data).map(([name, value]) => {
const input = document.createElement('input');
return Object.assign(input, { type: 'hidden', name, value });
})
);
document.body.append(form);
form.submit();